Want your cutting board to last longer and stay food-safe? The secret is regular oiling. In this guide, we’ll show you exactly how to oil a cutting board – what type of oil to choose, the right way to apply it, and how often to repeat. Follow these steps to keep your board smooth, durable, and ready for every meal.

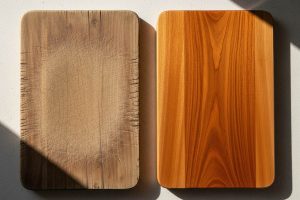
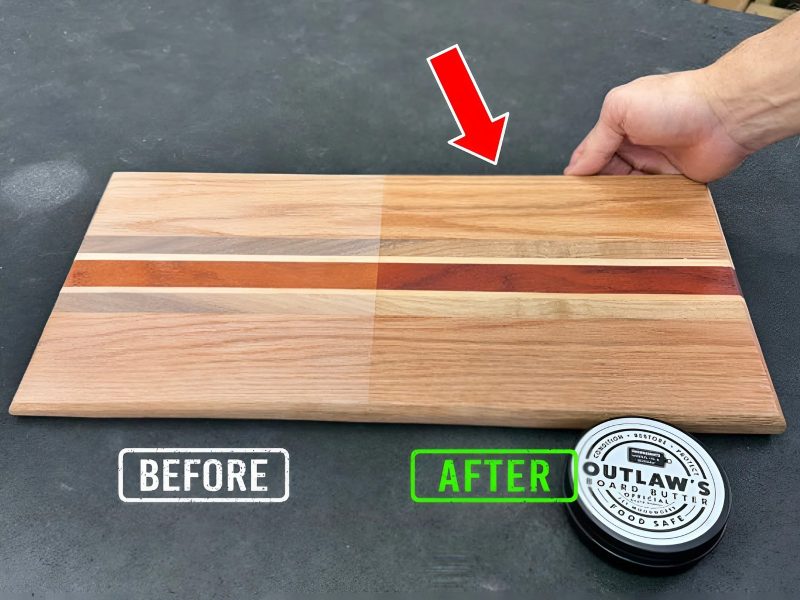
- Compare a cutting board before and after oiling: the left side is dry and pale, while the right side shows enhanced color, natural grain, and a subtle protective sheen
Why Oiling Your Cutting Board is Essential
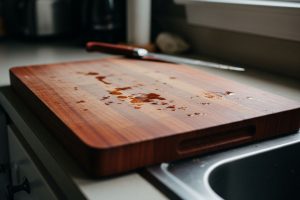
When you oil a cutting board, the oil penetrates the wood fibers and fills micro-pores, creating a hydrophobic barrier that locks in the right amount of moisture. This prevents drying, cracks, splits, cupping, and warping, and reduces water absorption so the board dries faster—helping deter mold and mildew. Oiling also smooths raised grain and seals knife marks, making the surface easier to clean and less prone to splintering. It resists stains and odors and preserves the wood’s color and luster, extending the board’s lifespan.

- Applying oil deeply penetrates the cutting board’s wood fibers, locking in moisture and preventing cracks, while enhancing the natural grain

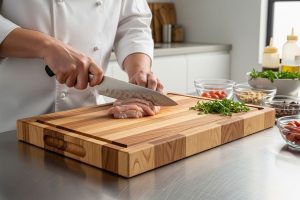
Beyond the practical benefits, regular oiling not only enhances your board’s natural grain patterns and rich color tones but is also key to properly season a wood cutting board. A well-oiled board develops a subtle sheen that elevates your kitchen aesthetic while showcasing the wood’s unique character. It’s this combination of beauty and functionality that makes proper oiling essential for any serious home cook.
- Regular oiling creates a water-resistant surface that prevents stains and food particles from settling, while enhancing the cutting board’s natural grain, color, and overall kitchen aesthetic
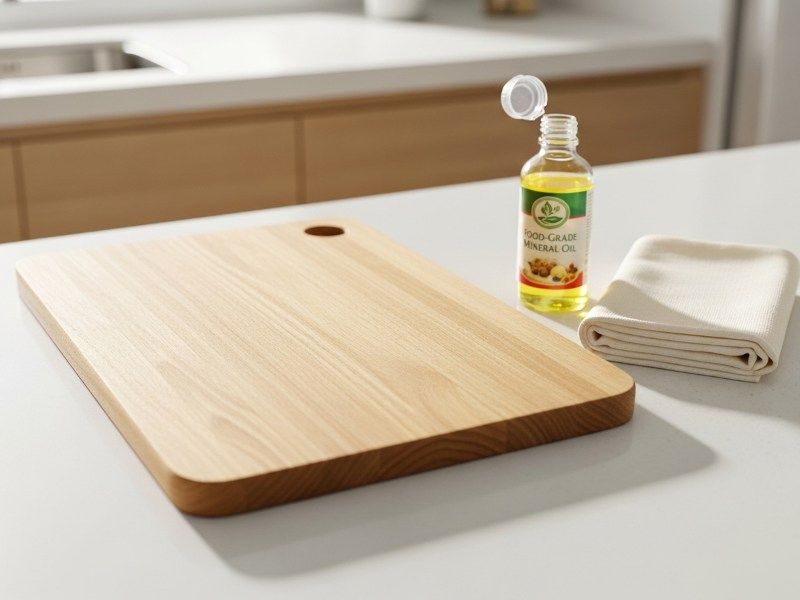
Tools, Oils, and Supplies You’ll Need
Having the right supplies on hand ensures your oiling session goes smoothly without interruptions. Let’s explore what works best and what to avoid.
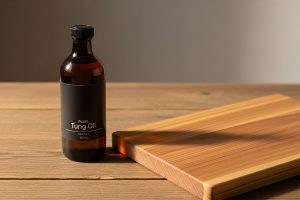
Best Oils for Cutting Boards
Food-grade mineral oil is the most recommended choice—safe, odorless, and deeply protective without going rancid. For added water resistance, mix it with beeswax or carnauba wax to create a longer-lasting seal.
Pure tung oil, food-grade linseed oil, fractionated coconut oil, walnut oil, and grapeseed oil are also excellent options, though walnut and grapeseed oil are less commonly used. All of these penetrate deeply into the wood fibers, with tung and linseed oil forming a hardened, durable finish, though they require longer drying times.
Oils to Avoid
Skip cooking oils like olive, canola, vegetable, or coconut oil for cooking—they can oxidize and turn rancid, causing odors, bacterial growth, and damage to your board.
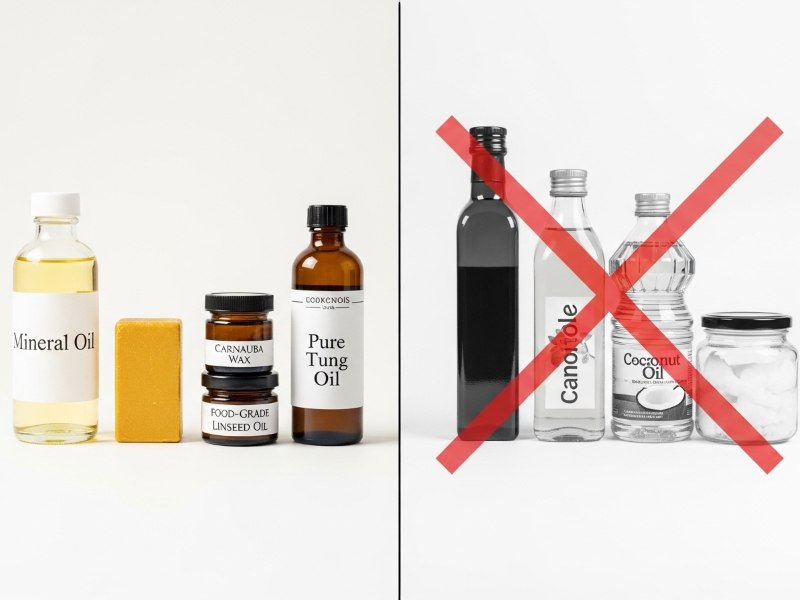
- Recommended oils for cutting boards include mineral oil, tung oil, linseed oil, fractionated coconut oil, walnut, and grapeseed oil, while cooking oils like olive, canola, vegetable, and coconut for cooking should be avoided
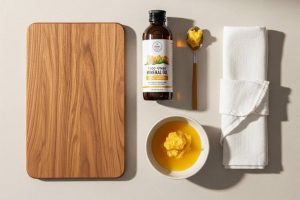
Tools & Accessories for Oiling
Start with soft, lint-free cloths or clean cotton rags for oil application. Old t-shirts work perfectly when cut into manageable squares. Avoid paper towels, which can leave fibers embedded in the wood grain.
A soft-bristled brush helps push oil deep into knife marks and along juice grooves where cloths might miss. It also makes application more efficient on textured areas. For larger boards, a clean sponge works well to spread oil quickly and evenly across the surface.
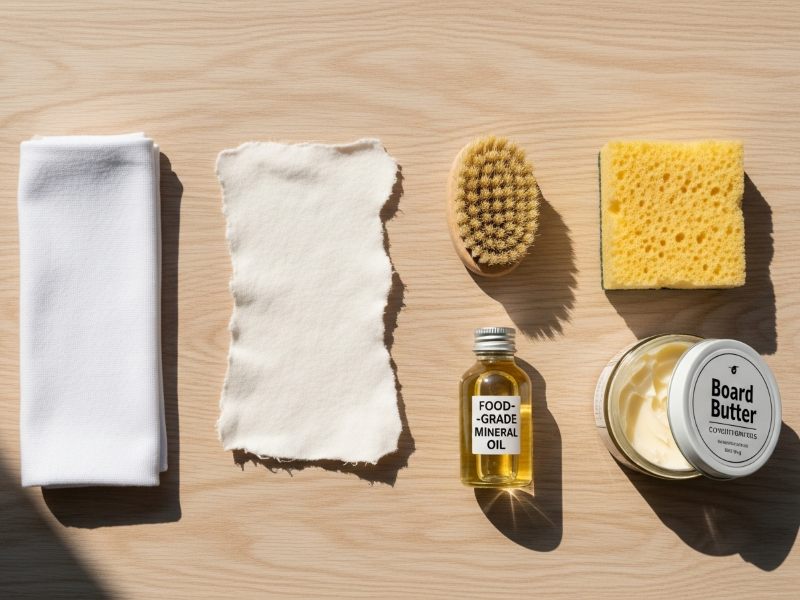
- Essential tools for maintaining your cutting board include soft cotton cloths, natural bristle brushes, clean sponges, and optional board butter or conditioning cream for extra protection
Step-by-Step Oiling Instructions
Following a systematic approach ensures even coverage and optimal protection for your cutting board. Let’s walk through each crucial step.
Pre-Oiling Preparation
Before applying oil, make sure your cutting board is completely clean and dry—this ensures the oil can penetrate properly.
-
Wash with warm water and mild dish soap.
-
Scrub gently with a soft brush to clear food particles from knife marks and grooves.
-
Never soak or put it in the dishwasher.
-
Rinse quickly to remove soap residue.
-
Pat dry with a clean towel, then air-dry at least 2 hours.
-
If the board feels rough, sand lightly with 220-grit sandpaper along the grain for a smoother, more absorbent surface.
- Thoroughly clean your cutting board with warm water and a soft brush, pat dry, and sand lightly if needed to ensure a smooth surface for optimal oil absorption
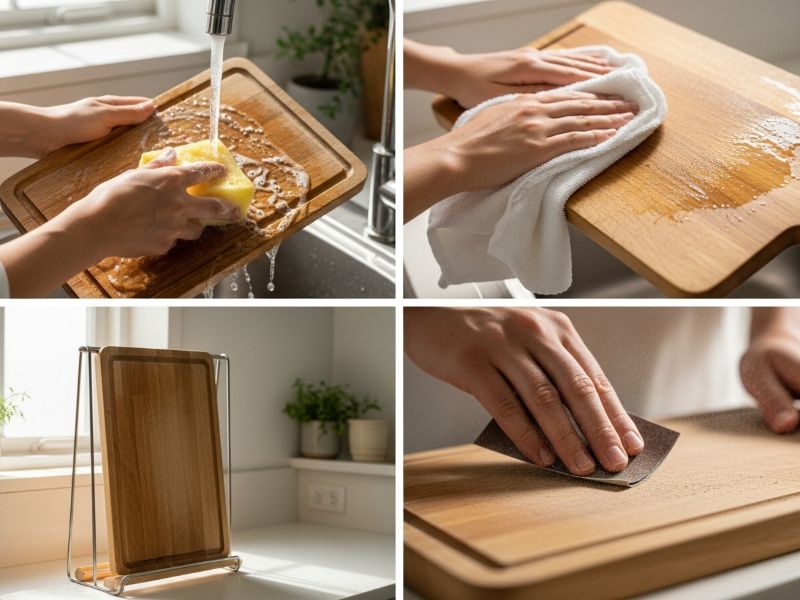
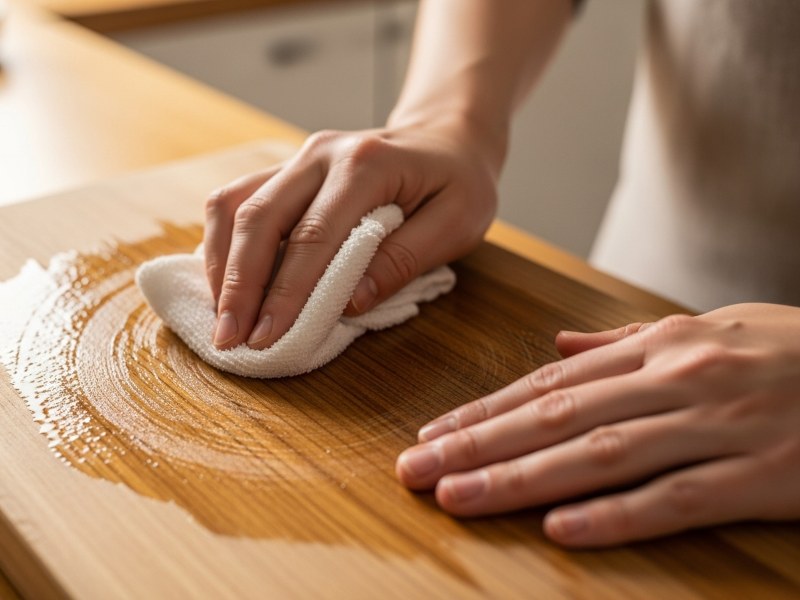
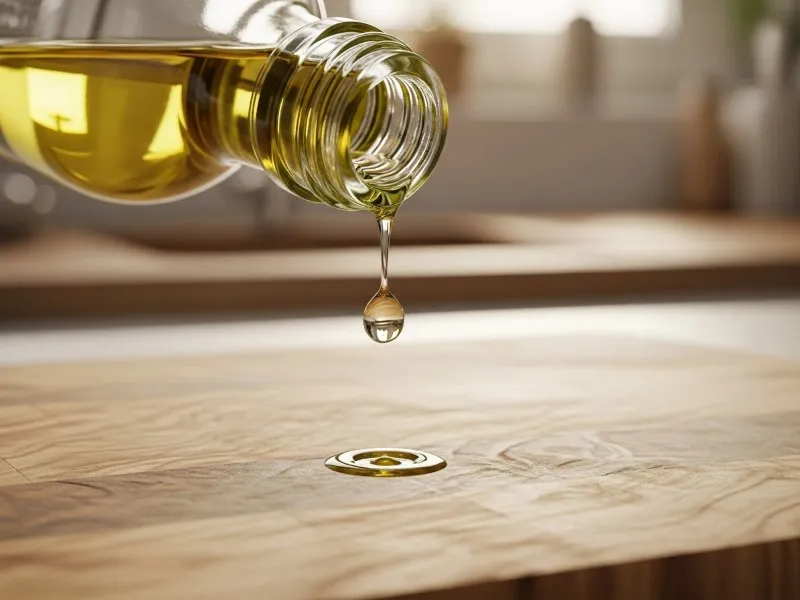
Applying the First Coat
Now that your board is clean and dry, it’s time to oil it properly.
-
Pour about 2 tablespoons of oil directly onto the board (for a standard size).
-
Use a clean cloth or sponge to spread the oil evenly.
-
Work in circular motions along the wood grain.
-
Don’t forget the edges and handles, as they wear down fastest.
-
Apply firm pressure, as if giving the board a massage, to help the oil penetrate deeply.
-
The surface should look saturated but not dripping with excess oil.
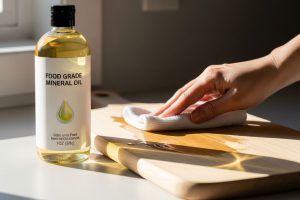
- Pour and evenly spread oil across your cutting board using a cloth or sponge, ensuring deep penetration into the wood grain for protection and enhanced appearance
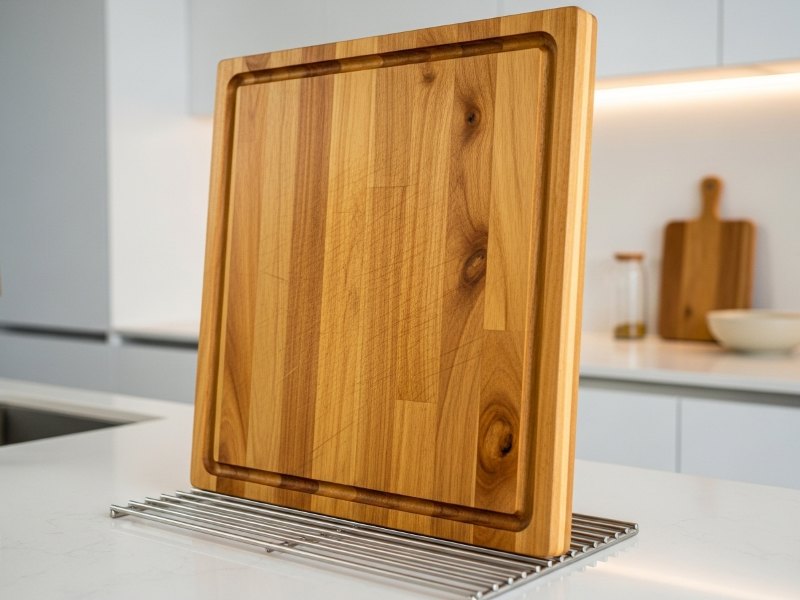
Allowing Proper Absorption Time
Once the board is coated, allow enough time for the oil to soak deeply into the wood.
-
Place the board upright or flat on a drying rack in a well-ventilated area.
-
Let it absorb for at least 4–6 hours; overnight is best.
-
During this time, the oil penetrates deep into the wood fibers, filling tiny gaps and strengthening the structure.
-
The board’s color will darken slightly and look more uniform as the oil spreads through the grain.
- Prop your cutting board upright in a well-ventilated area to allow the oil to fully absorb, deepening the wood color and creating a protective barrier
Adding Multiple Coats
After the first coat has fully dried, continue applying more layers of oil for lasting protection.
-
Add 2–3 additional coats using the same technique.
-
Allow 4–6 hours for each coat to absorb before applying the next.
-
Each new coat strengthens the protective barrier and keeps the wood conditioned.
-
Stop when the surface no longer absorbs oil easily and has a subtle sheen.
-
Extra-dry boards may need up to 5 coats at the beginning.
-
Wipe away any excess oil with a clean, dry cloth after the final coat.
- Build up protection by applying 2–3 additional coats of oil, allowing each layer to fully absorb, enhancing durability and achieving a subtle, even sheen

Using Board Butter or Cream (Optional – Bonus)
Board butter is a blend of oil and natural waxes that conditions wood while adding extra water resistance. Use it after your regular oiling routine, especially if the board looks dry between monthly maintenance. The wax forms a protective seal that helps the oil last longer—ideal for boards used daily or washed often.
- Using board butter adds a protective layer of wax and oil, locking in moisture and enhancing water resistance for long-lasting cutting board care
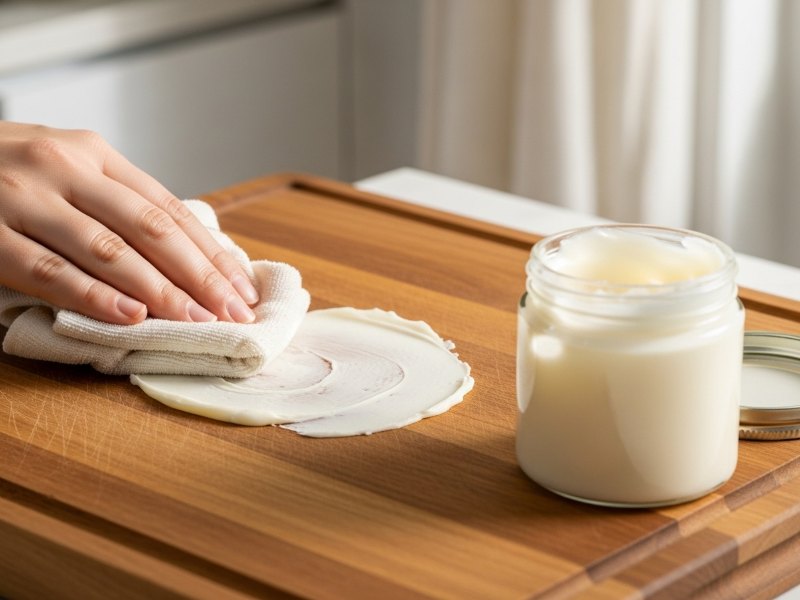
Steps to Wax a Cutting Board
-
Scoop a small amount of board butter with a clean cloth.
-
Spread a thin, even layer across the entire surface.
-
Let it sit for 20–30 minutes to penetrate.
-
Buff with a dry cloth until the board develops a smooth sheen.
-
Enjoy a board that’s protected and polished with a professional finish.
- The left side shows the cutting board before applying board butter, slightly dry and matte, while the right side shows a subtle sheen and enhanced grain after application, demonstrating the protective and aesthetic benefits
Maintenance Schedule
Establishing a consistent maintenance routine ensures your cutting board remains in peak condition year-round. The frequency depends on usage patterns and environmental factors.
New Board Care
During your board’s first month, commit to weekly oiling sessions to properly condition the wood. This initial intensive treatment allows the wood fibers to become fully saturated, creating a strong foundation for long-term protection. New boards are particularly thirsty and will absorb surprising amounts of oil during this break-in period.
Think of this phase as training your board to resist moisture and stains. Each application builds resilience, and by the end of the month, you’ll have a well-seasoned board ready for years of reliable service.
- During the first month, weekly oiling helps condition a new cutting board, fully saturating the wood fibers and building a strong foundation for long-term protection
Regular Maintenance
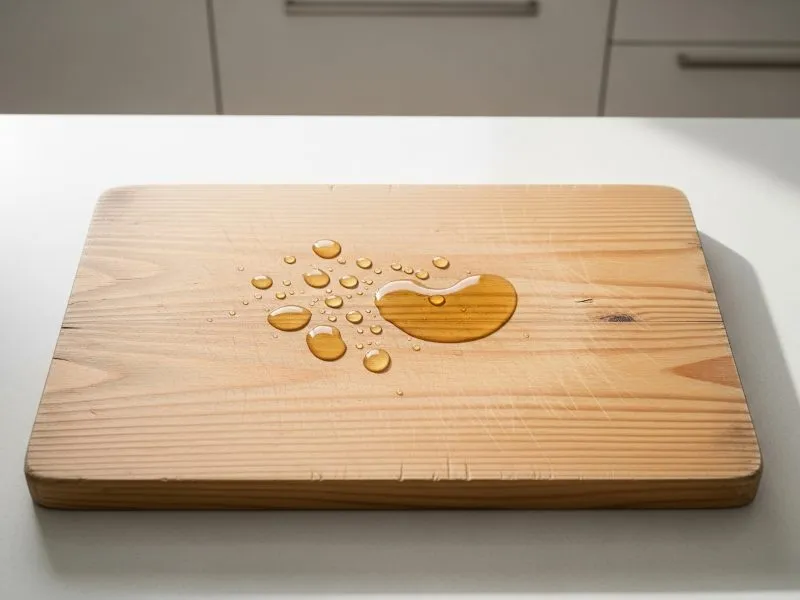
After the initial conditioning period, most boards need oiling once a month with regular use. Heavy-use boards in professional or avid home kitchens might require bi-weekly attention. Watch for telltale signs that your board needs oil: a dry, pale appearance, water absorbing quickly instead of beading up, or a rough texture developing.
The “water test” provides a quick assessment—sprinkle a few drops of water on the surface. If they bead up and roll off, your board is well-protected. If the water soaks in quickly, it’s time to oil. Environmental factors like dry climates or heated homes during winter may necessitate more frequent oiling.
- Applying a generous coat of food-grade mineral oil onto the cutting board helps protect the wood, lock in moisture, and prevent cracking or warping
Troubleshooting Common Problems
Even with proper care, cutting boards can develop issues that require special attention. Here’s how to address the most common challenges.
Absorption Problems
If oil sits on the surface without absorbing, your board likely has residue blocking the pores. Food particles, soap buildup, or previous finishing products can create this barrier. Clean the board thoroughly with warm water and baking soda, scrubbing gently to open the pores.
Sometimes, extremely dry boards paradoxically resist initial oil absorption. In these cases, warm the oil slightly (just above room temperature) to reduce viscosity and improve penetration. Apply thinner coats and allow extra absorption time between applications.
- Oil sitting on the cutting board’s surface instead of penetrating indicates residue or extreme dryness. Proper cleaning and thinner coats help the wood absorb oil effectively
Surface Issues
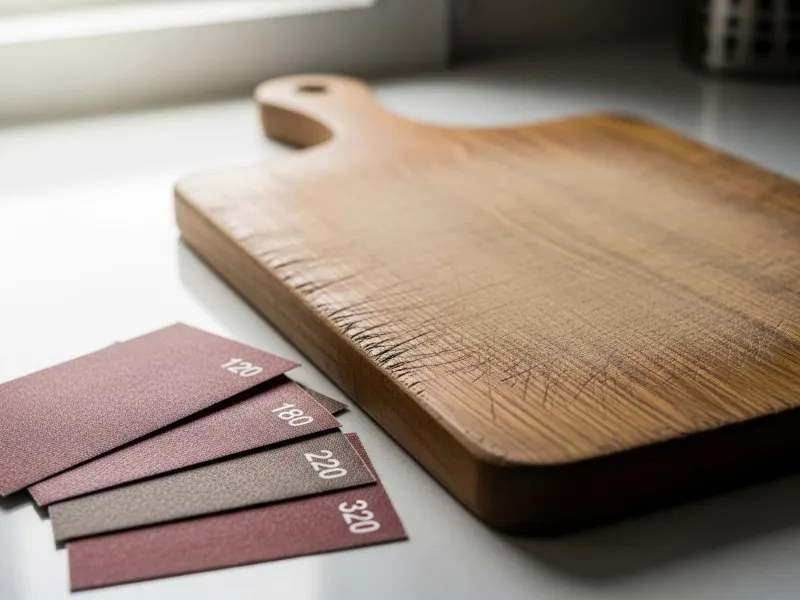
Minor scratches and knife marks are normal, but deep gouges can harbor bacteria and should be addressed. Sand problem areas with fine-grit sandpaper (220-320 grit), always following the wood grain. After sanding, clean thoroughly to remove all dust before re-oiling.
For boards with severe damage or deep staining, consider a full restoration. Sand the entire surface progressively with 120, 180, and 220-grit papers. This removes the damaged layer and exposes fresh wood ready for conditioning. Follow with 3-5 coats of oil to fully protect the renewed surface.
- Sanding removes scratches and damaged layers from a cutting board, preparing a smooth, clean surface for re-oiling and long-term protection
FAQ
How often should I oil my cutting board? For regular home use, monthly oiling keeps your board in excellent condition. Heavy-use boards need attention every 2-3 weeks, while occasional-use boards can go 6-8 weeks between treatments. Always trust the visual and tactile cues – dry, pale wood needs oil regardless of schedule.
Can I use coconut oil? Yes – but only fractionated coconut oil. Regular coconut oil can turn rancid, while fractionated stays stable, food-safe, and suitable for board care.
Do I need to wash my cutting board before using it after oiling? Yes. Once the oil has fully absorbed – typically after resting for 4–6 hours or overnight – give the board a quick wash with warm water and mild dish soap before using it for food prep. This removes any unabsorbed oil on the surface and ensures the board is clean and ready for safe use.
Caring for your wooden cutting board isn’t just maintenance—it’s an investment in your kitchen’s performance and style. With the right oil, proper technique, and a consistent schedule, you can keep your board strong, safe, and beautiful for years to come. Now that you know exactly how to oil a cutting board to protect it, give your board the care it deserves today, and it will continue to serve as a reliable partner in every meal you create. At Koppen Home Living, we believe every great dish starts with tools that are loved and well-maintained.