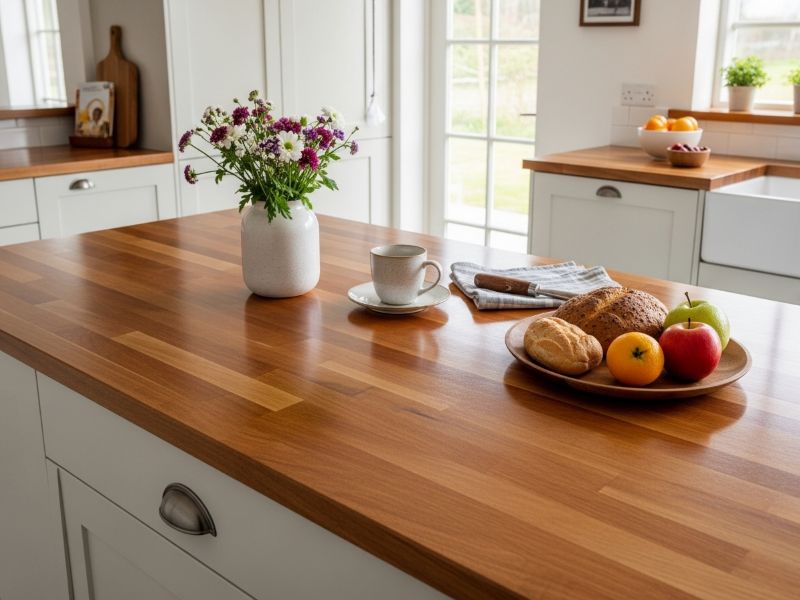
How to Finish Butcher Block Countertops adds lasting beauty, protection, and functionality to your kitchen. These warm, hardwood surfaces need proper finishing to prevent water damage, stains, and bacterial growth. This guide breaks down the best finishes, step-by-step instructions, and maintenance tips to ensure your butcher block stays durable, safe, and stunning for years.

Why Finishing Butcher Block Countertops Is Important
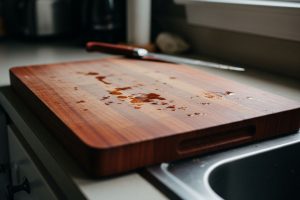
Unfinished wood countertops face numerous challenges in kitchen environments. Water penetration creates perfect conditions for bacterial growth, compromising food safety and creating health risks. Moisture also causes wood movement, leading to cracks, warping, and eventual structural failure.
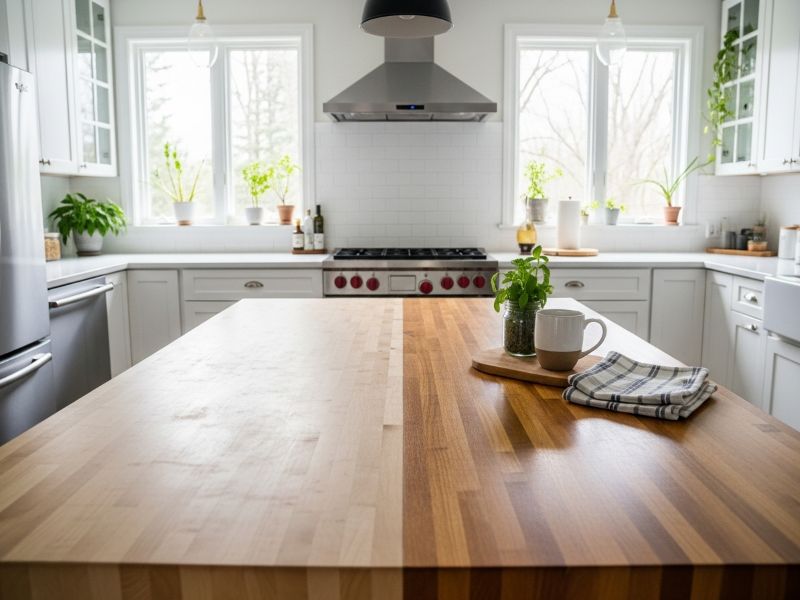
Proper finishing creates a protective barrier that addresses these concerns while enhancing the wood’s natural beauty. The finish penetrates wood fibers, filling microscopic gaps that would otherwise harbor bacteria and absorb liquids. This protection extends beyond basic functionality to preserve your investment’s aesthetic appeal.
Key benefits of finishing butcher block countertops include:
- Water resistance: Prevents moisture penetration that causes warping, splitting, and bacterial growth
- Stain protection: Creates a barrier against oils, wine, coffee, and other common kitchen spills
- Hygiene enhancement: Sealed surfaces resist bacteria accumulation, maintaining food safety standards
- Durability extension: Protected wood resists wear, scratches, and daily kitchen abuse
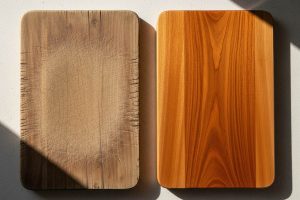
- Appearance improvement: Brings out natural grain patterns while adding depth and richness to color
- Value preservation: Maintains countertop condition for kitchen upgrades and home resale
Maintaining a finished surface is far cheaper than replacing a damaged countertop. With the right finish, butcher block shifts from being high-maintenance to a durable, low-care feature that actually improves over time. Investing in quality finishing not only extends the lifespan but also saves on costly repairs, making proper finish selection and application an essential step for any kitchen.
Choosing the Right Finish for Butcher Block Countertops
Picking the right finish for butcher block countertops starts with understanding food-safe and non-food-safe options. Food-safe finishes allow direct food contact and usually penetrate deep into the wood fibers, protecting from within. Non-food-safe finishes form a hard surface film, offering maximum protection but requiring cutting boards to avoid direct contact during food prep.
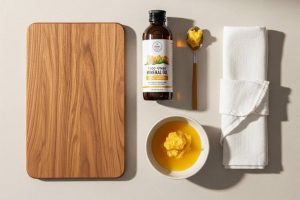
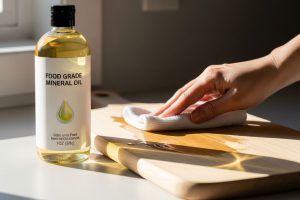
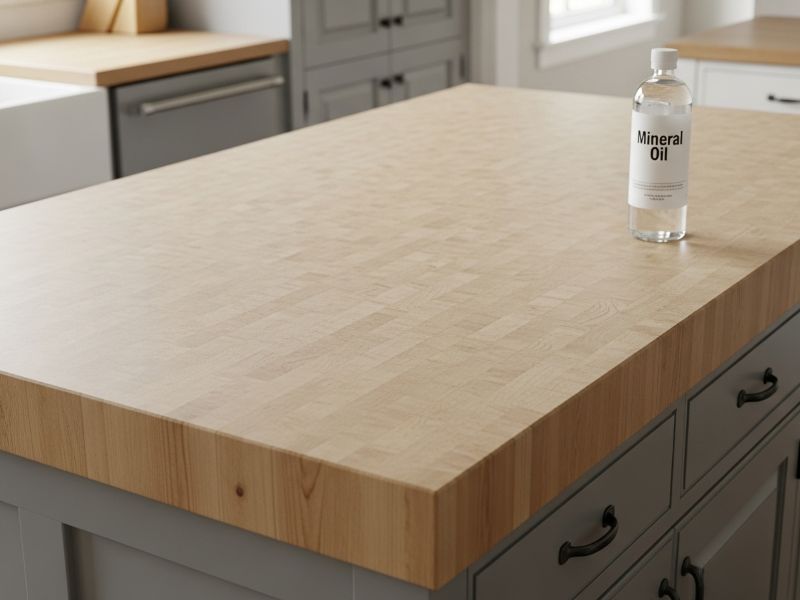
Mineral Oil (Food-Safe)
Mineral oil is the simplest and most affordable choice. It penetrates wood fibers, adds water resistance, and is easy to apply. However, it never fully cures, so you’ll need to reapply monthly on heavily used counters. Ideal for cutting boards and lightly used surfaces.
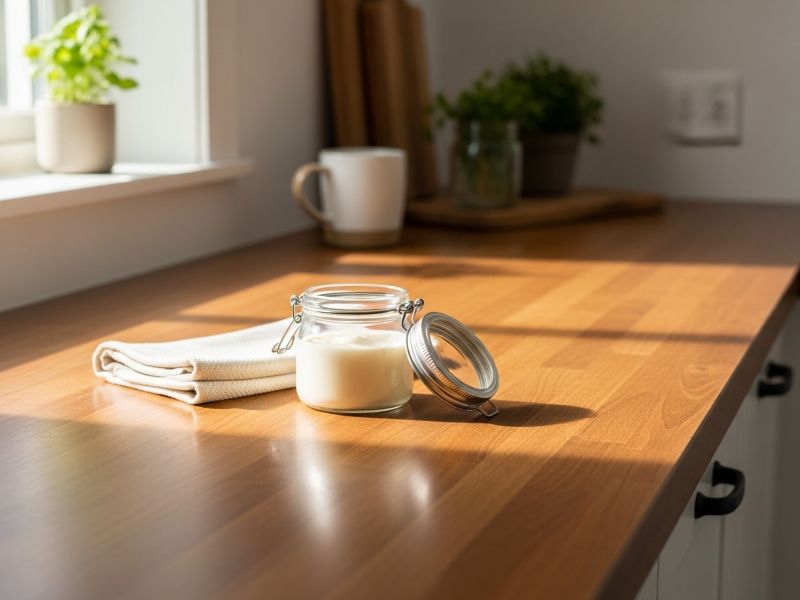
Beeswax Blends (Food-Safe)
Blends of mineral oil and beeswax, like Howard Butcher Block Conditioner, provide better stain resistance and a subtle shine. They require reapplication every 2–3 months. Beeswax fills pores effectively but can soften under heat, so it’s best for moderate-use kitchens.
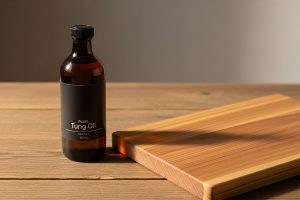
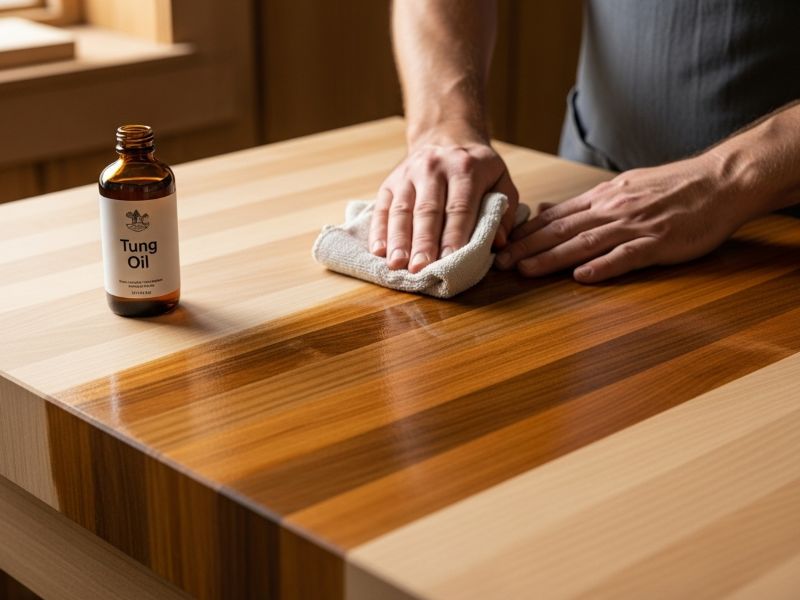
Tung Oil (Food-Safe After Curing)
Pure tung oil offers excellent water resistance and a natural grain-enhancing finish. It penetrates deeply and provides long-lasting protection. The trade-off is a 30-day curing period before food contact, and careful application is essential to avoid sticky spots.
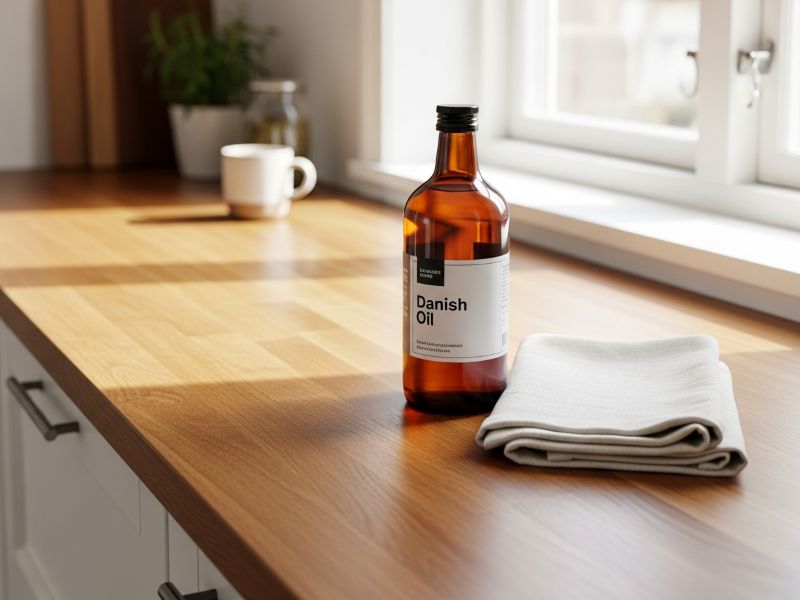
Danish Oil (Mostly Non-Food-Safe)
Danish oil blends tung oil with resins and solvents for faster curing and easier application. While it enhances wood grain and offers moderate durability, most Danish oils contain non-food-safe additives, making them better for decorative counters or prep areas that use cutting boards.
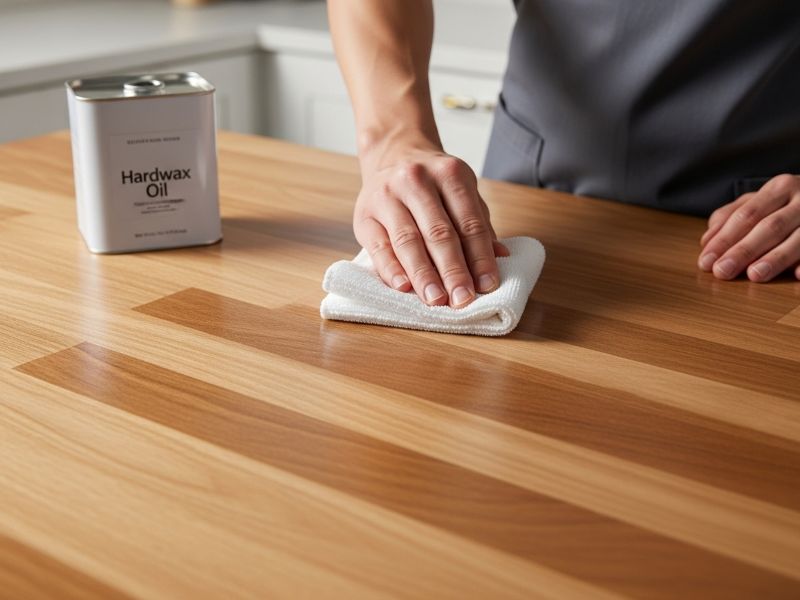
Hardwax Oils (Food-Safe Options Available)
Professional-grade products like Rubio Monocoat and Osmo Polyx combine oil penetration with wax protection. They cure to a durable, water- and stain-resistant surface while maintaining wood’s natural feel. Hardwax oils can last 3–5 years before renewal, making them an excellent low-maintenance option.
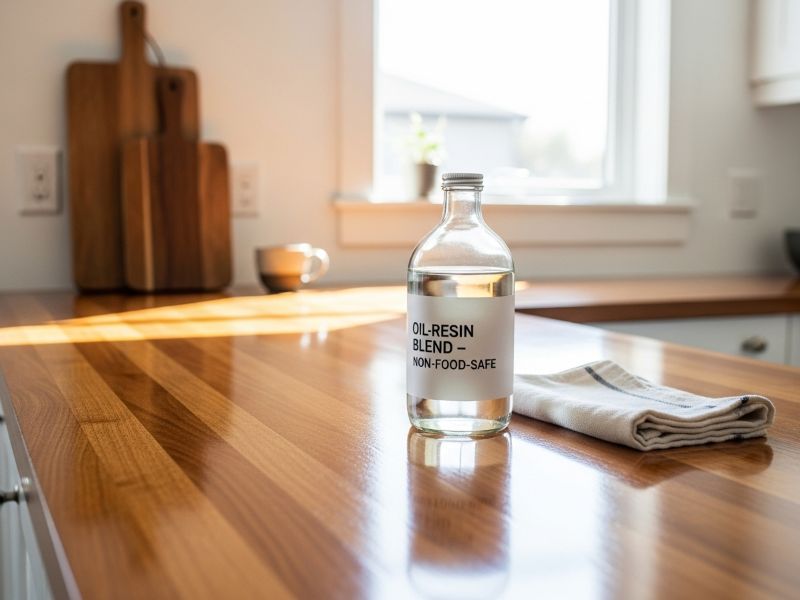
Oil-Resin Blends (Non-Food-Safe)
Finishes like Waterlox blend tung oil and resins to create tough, water-resistant films. They’re perfect for high-use areas but aren’t safe for direct food contact, so cutting boards are a must. Their durability makes them ideal for busy kitchens where protection outweighs food-safe concerns.
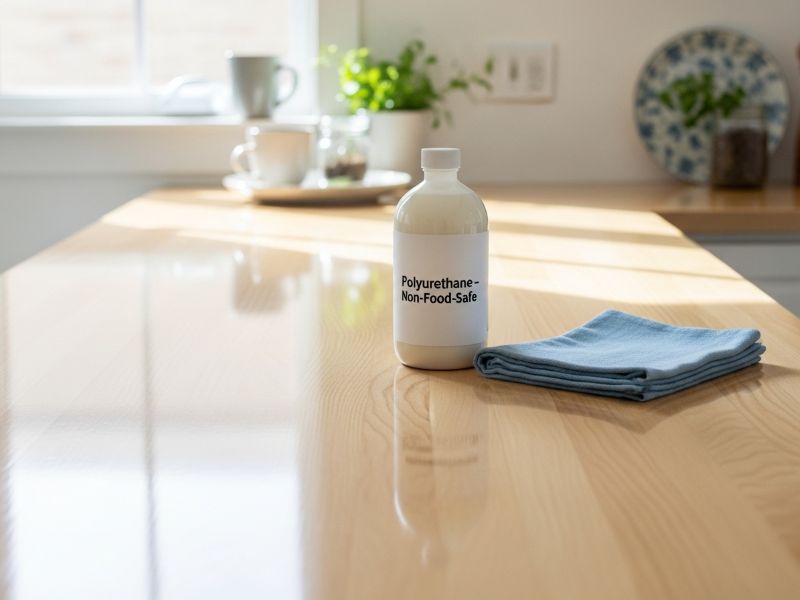
Polyurethane and Varnish (Non-Food-Safe)
Film-forming finishes like polyurethane offer unmatched resistance to water, stains, and wear. They’re long-lasting and low-maintenance but remove the natural feel of the wood and aren’t safe for direct food prep. Use them on decorative countertops or bar tops where appearance and durability matter most.
By weighing durability, food safety, appearance, and maintenance effort, you can choose a finish that matches how you’ll use your butcher block countertop.
Comparison Chart
| Finish Type | Food-Safe | Durability | Maintenance | Appearance | Cost |
|---|---|---|---|---|---|
| Mineral Oil | Yes | Low | Monthly | Natural | Low |
| Beeswax Blend | Yes | Medium | 2-3 months | Enhanced | Medium |
| Tung Oil | Yes | High | 6-12 months | Natural | Medium |
| Danish Oil | No | Medium | 6-12 months | Enhanced | Medium |
| Hardwax Oil | Yes | High | 3-5 years | Enhanced | High |
| Oil-Resin | No | Very High | 5-10 years | Enhanced | High |
| Polyurethane | No | Maximum | 10+ years | Glossy | Medium |
Decision Matrix
Cutting boards
Use mineral oil or beeswax blends. These require frequent reapplication but keep the board safe, hydrated, and easy to maintain.
Prep counters
Choose tung oil or food-safe hardwax oils for a balance of protection and safety. They penetrate deeply to resist moisture while providing a natural, low-sheen finish.
Bar tops
Opt for oil-resin blends or polyurethane finishes. These offer maximum durability and spill resistance, while enhancing the wood’s appearance and highlighting the grain.

Choose finishes based on intended use, maintenance preferences, and aesthetic goals rather than solely on initial cost considerations.
Read more: Best Wood for Butcher Block: Complete Guide
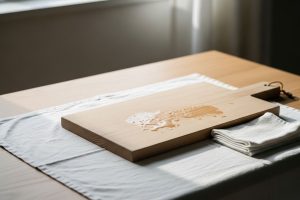
Preparing Butcher Block Countertops for Finishing
Proper preparation determines finish quality and longevity more than any other factor. Inadequate sanding or cleaning creates finish adhesion problems that lead to premature failure. Professional results require systematic preparation following proven techniques.
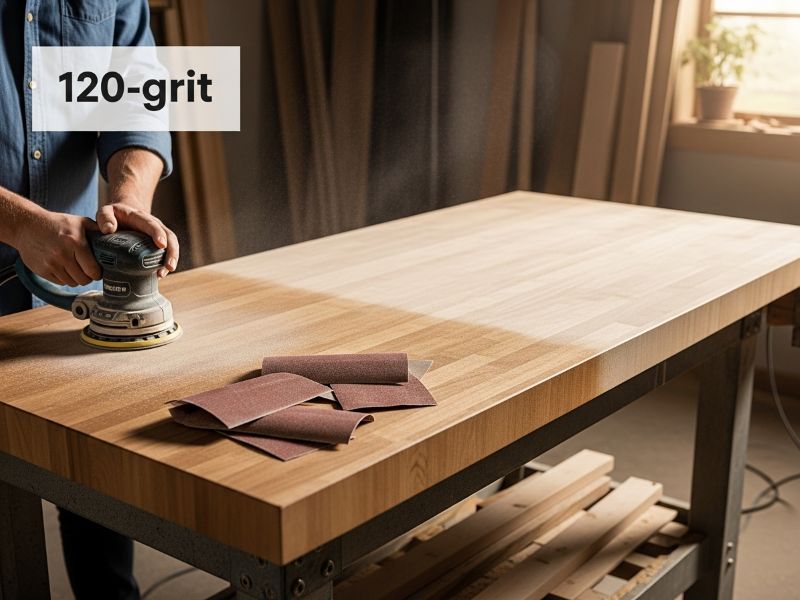
Step 1: Initial Sanding
Start with 80-grit sandpaper to remove mill marks, stains, and imperfections. Sand with the grain using consistent pressure, overlapping each pass by half its width for even coverage.
Tools: Use a random orbital sander for large areas, detail sanders for edges/corners, and hand sanding for maximum control. Avoid pressing too hard to prevent gouges.
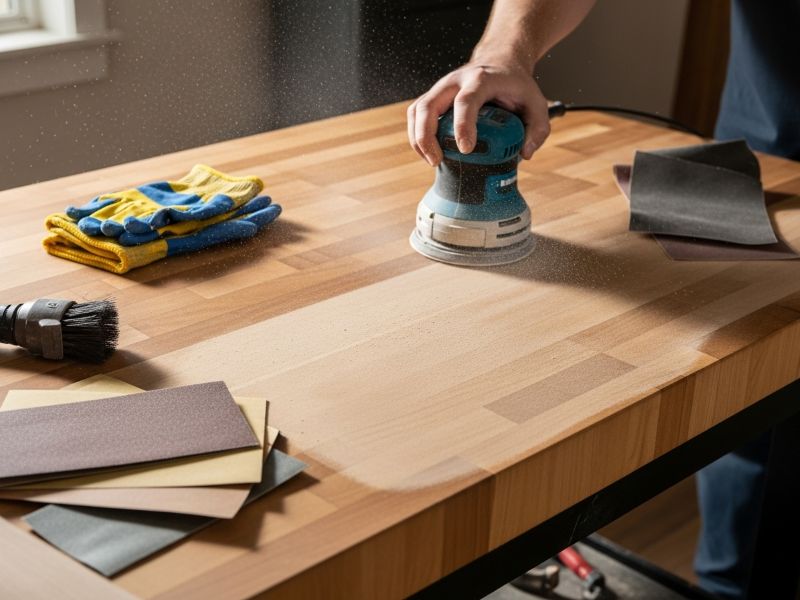
Step 2: Progressive Sanding
Move to 120-grit, then 220-grit, smoothing the surface further at each stage. Each grit removes the scratches from the previous one – don’t skip grits, or scratch marks may show after finishing. Sand the entire surface evenly with every grit to maintain consistent smoothness.
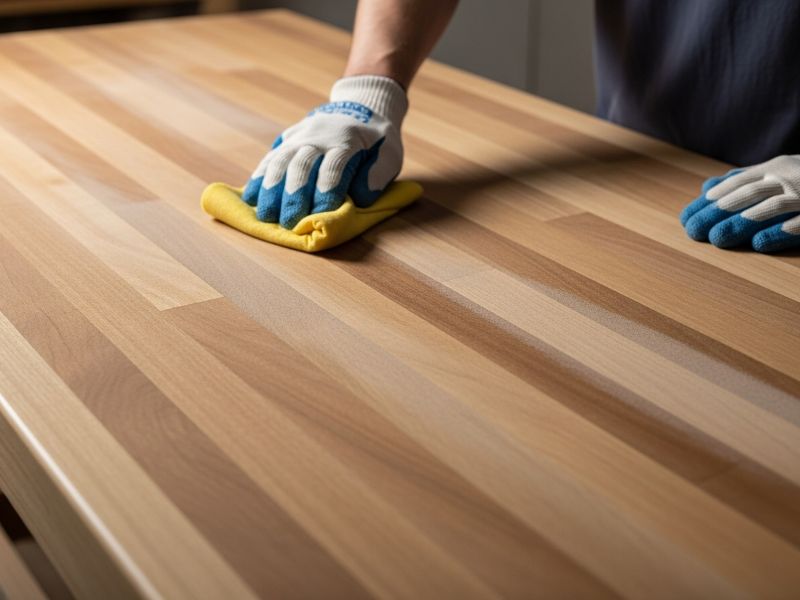
Step 3: Cleaning the Surface
Vacuum all sanding dust from the countertop and surrounding area. Use compressed air for grain crevices, then wipe with a tack cloth to remove remaining particles.
Stretch or shake tack cloths before use, wipe with the grain using light pressure, and replace them when loaded with dust.
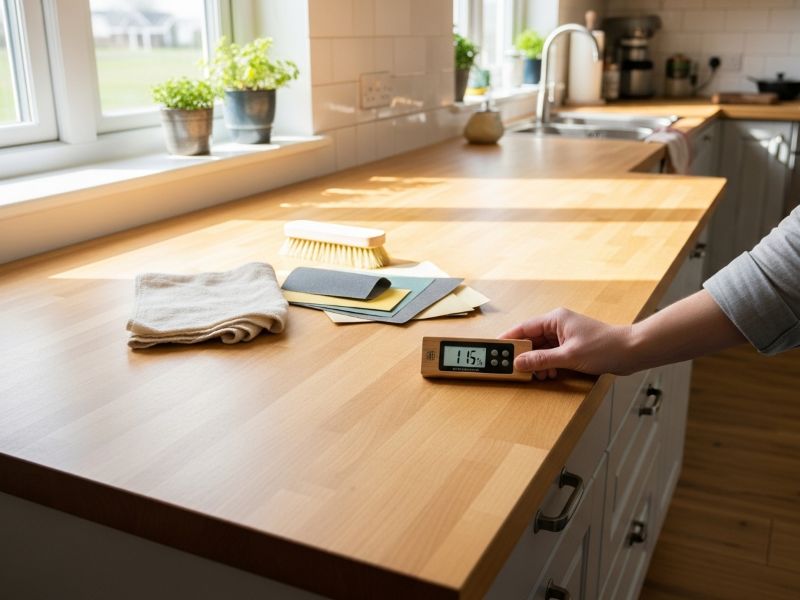
Step 4: Moisture Check
Confirm the wood’s moisture content is below 12% before finishing. While a moisture meter is ideal, wood that feels dry and has acclimated indoors for at least one week usually meets this standard. Finishing damp wood can block penetration and cause curing issues.
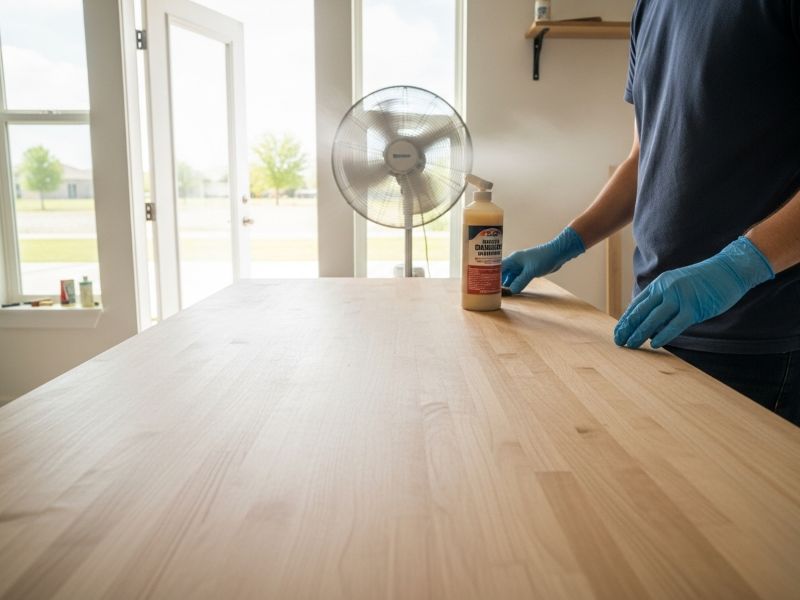
Step 5: Safety Preparation
Ensure good ventilation – open windows, use fans, and avoid enclosed spaces. Many finishes release harmful vapors.
- Protective Gear: Wear nitrile gloves, keep a fire extinguisher nearby, and store oily rags in metal containers with tight lids to prevent spontaneous combustion.
- Environmental Conditions: Apply finishes at 65 – 75°F with humidity below 70% to prevent poor leveling, adhesion failure, or slow curing.
Step-by-Step Guide to Finishing Butcher Block Countertops
The application process varies by finish type, but general principles remain consistent across all options. Successful finishing requires proper timing, adequate ventilation, and patience for complete curing. Rush any step and compromise the entire finish quality.
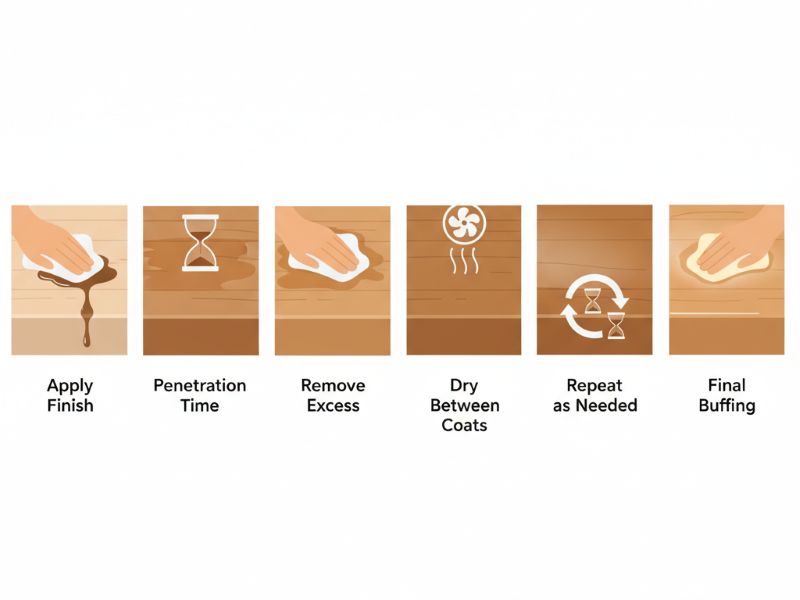
General Application Workflow
Every finish follows the same basic sequence: apply the finish material, allow penetration time, remove excess material, allow drying between coats, and repeat as needed. Final buffing enhances appearance and durability for most finish types.
Work in manageable sections to maintain wet edges and ensure even coverage. Large countertops may require helpers to complete application before the finish begins setting. Plan application sequence to avoid trapped areas or difficult-to-reach spots.
Read more:How to Oil a Cutting Board: Step-by-Step Guide for Long-Lasting Results
Mineral Oil and Beeswax Application
Materials needed: Food-grade mineral oil, pure beeswax (optional), lint-free cloths, fine steel wool (0000 grade)
- First oil coat: Pour mineral oil liberally across the surface, spreading with a lint-free cloth. Work oil into the wood grain using circular motions followed by straight strokes with the grain.
- Penetration time: Allow 15-30 minutes for oil penetration. Wood will absorb oil at different rates depending on species and grain orientation. Dense grain areas may require longer penetration time.
- Excess removal: Wipe excess oil completely using clean, dry cloths. Any remaining surface oil will feel sticky and collect dust. Multiple wiping passes may be necessary for complete removal.
- Drying time: Allow 8-12 hours between coats for oil absorption and surface drying. Humid conditions extend drying times, while dry conditions accelerate the process.
- Additional coats: Apply 2-3 additional coats following the same process. Each coat provides additional protection and enhances wood appearance. Stop when wood no longer absorbs significant amounts of oil.
- Beeswax application (optional): Warm beeswax slightly for easier spreading. Apply thin coats using circular motions, then buff with clean cloths. The wax adds shine and additional water resistance.

Tung Oil Application
Materials needed: Pure tung oil, lint-free cloths, fine sandpaper (320-grit), tack cloths
- Thinned first coat: Dilute first coat with 25% mineral spirits for better penetration. Apply with lint-free cloth using long strokes with the grain. Work quickly to maintain wet edges.
- Saturation application: Apply oil until wood stops absorbing, indicated by surface pooling. Different grain areas absorb at different rates, requiring attention to ensure complete saturation.
- Excess removal: Remove all surface oil after 15-30 minutes using clean cloths. Check for missed spots that could cure sticky or uneven. Multiple wiping passes ensure complete removal.
- Curing time: Allow 24-48 hours between coats for proper curing. Tung oil cures by oxidation, requiring oxygen exposure and adequate time for chemical cross-linking.
- Light sanding: Sand lightly with 320-grit between coats to remove raised grain and ensure smooth surfaces. Clean with tack cloth before applying subsequent coats.
- Final coats: Apply 2-3 additional full-strength coats following the same process. Each coat builds protection and depth. The final result should feel smooth without surface film buildup.

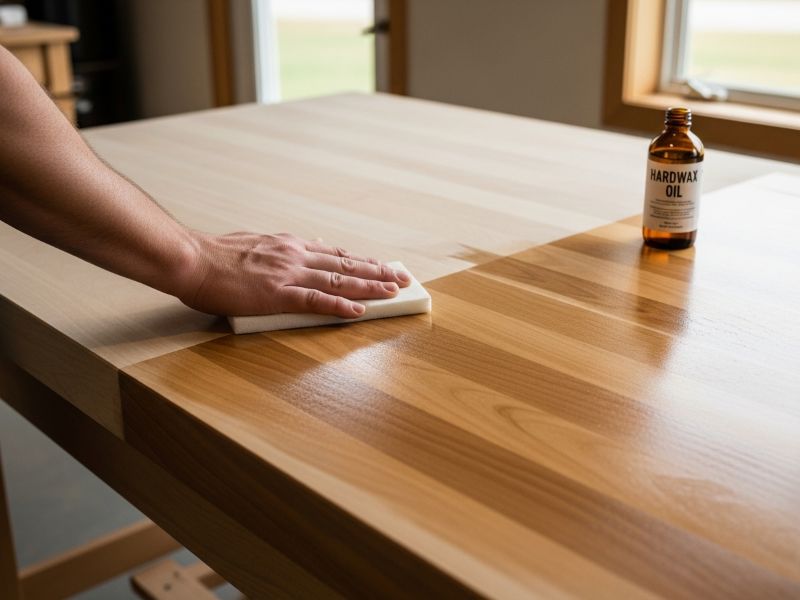
Hardwax Oil Application
Materials needed: Hardwax oil finish, microfiber cloths, white pad (fine abrasive), clean cloths for buffing
- First coat application: Apply hardwax oil using microfiber cloth in thin, even coats. Work in 2-3 foot sections to maintain control and ensure even coverage.
- Working time: Most hardwax oils provide 20-30 minutes working time before beginning to cure. Work efficiently but thoroughly within these time limits.
- Surface working: Use white pads to work the finish into the wood grain. Apply moderate pressure while maintaining even coverage. This ensures maximum penetration and eliminates excess material.
- Buffing: Buff immediately with clean, dry cloths to remove excess material and create a uniform appearance. The surface should feel smooth without tackiness or residue.
- Curing period: Allow 12-24 hours curing before light use, with full cure requiring 5-7 days. Avoid heavy use or water exposure during curing periods.
- Second coat (if needed): Some hardwax oils benefit from second coats in high-wear areas. Follow manufacturer recommendations for recoat timing and application methods.
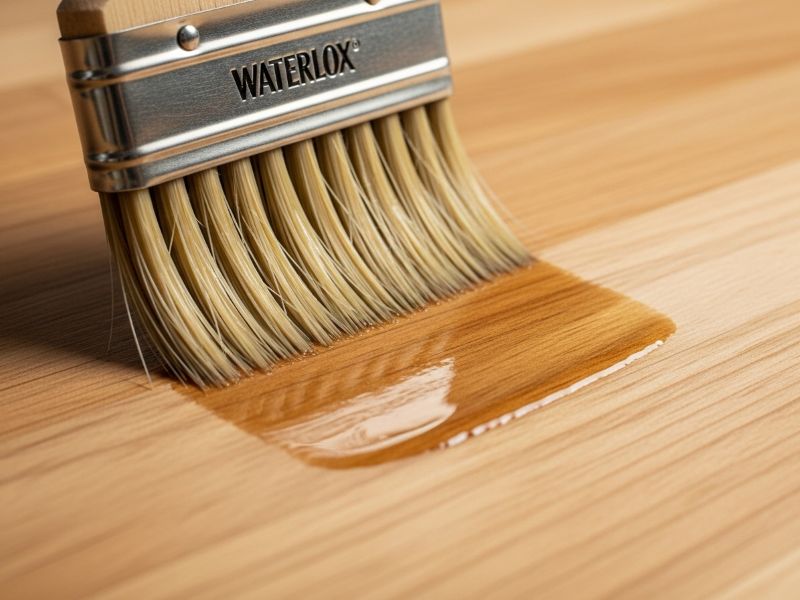
Waterlox (Oil-Resin) Application
Materials needed: Waterlox finish, natural bristle brush or foam applicator, fine sandpaper, tack cloths, mineral spirits for cleanup
- Thin first coat: Apply first coat using natural bristle brush or foam applicator. Work with the grain in long, even strokes. Maintain wet edges to prevent lap marks.
- Penetration time: Allow 15-20 minutes for wood absorption. The first coat penetrates deeply into wood fibers while beginning surface film formation.
- Light sanding: Sand lightly with 220-grit between coats once fully dry (24-48 hours). Remove all dust with tack cloth before applying subsequent coats.
- Build coats: Apply 2-3 additional coats for complete protection. Each coat adds durability and depth while building toward final film thickness.
- Final buffing: Light steel wool (0000 grade) followed by buffing compound creates satin finish if desired. Allow full cure (7-10 days) before heavy use.
Polyurethane Application
Materials needed: Food-safe polyurethane, high-quality synthetic brush, fine sandpaper, tack cloths, mineral spirits
- Surface preparation: Ensure perfect surface preparation as polyurethane magnifies any imperfections. Final sanding with 220-grit creates optimal adhesion surface.
- Thin first coat: Thin first coat 10-15% with appropriate solvent for better penetration and leveling. Apply in thin, even coats using high-quality synthetic brushes.
- Dust prevention: Work in a dust-free environment as polyurethane remains tacky during curing, attracting airborne particles that create rough surfaces.
- Light sanding: Sand lightly between coats with 320-grit once fully cured. This removes imperfections and provides mechanical adhesion for subsequent coats.
- Build film: Apply 3-4 coats total for complete protection. Each coat increases durability and moisture resistance while building toward desired film thickness.
- Final polishing: Polish final coat with appropriate compounds to achieve desired sheen level. Allow full cure (14-21 days) before heavy use.

Troubleshooting Common Issues
Sticky finish: Usually caused by insufficient excess removal or contaminated application materials. Strip and reapply using proper techniques and clean materials.
Uneven absorption: Results from inconsistent surface preparation or mixed wood species. Sand the entire surface to uniform grit and reapply finish systematically.
Bubbling: Caused by trapped air, contaminated surfaces, or application over uncured previous coats. Allow complete curing between coats and maintain clean application conditions.
Cloudy appearance: Often indicates moisture contamination or incompatible materials. Strip affected areas and reapply in controlled conditions using compatible products.
Maintenance Tips After Finishing
Proper care keeps your butcher block countertops protected, beautiful, and long-lasting. Use these easy-to-follow tips:
Regular Oil and Wax Reapplication
- Reapply the same oil finish periodically, focusing on high-use spots.
- Test by sprinkling water: if it absorbs instead of beads, reapply oil.
- Monthly touch-ups work for most kitchens but adjust based on use and climate.
Daily Cleaning
- Use mild soap and warm water with a soft cloth or sponge.
- Wipe spills immediately – standing water can damage even well-finished wood.
- Avoid bleach, ammonia, vinegar, or harsh cleaners that strip finishes or stain wood.
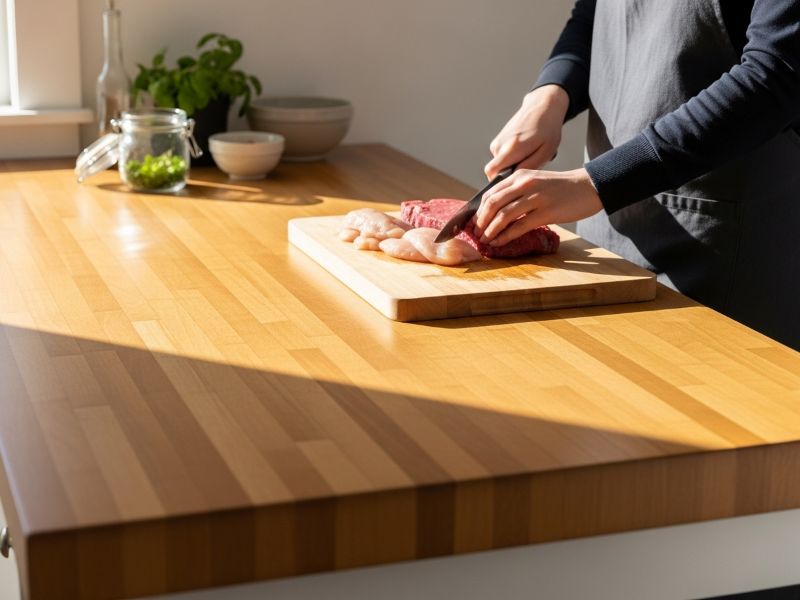
Use Cutting Boards
- Always prep food on cutting boards to protect the surface and maintain hygiene.
- Use boards large enough to cover your work area, and replace worn boards promptly.
Spot Repairs
- For scratches or stains, sand lightly with fine-grit paper, clean, and apply matching finish.
- Use multiple thin coats and let them cure completely before use.
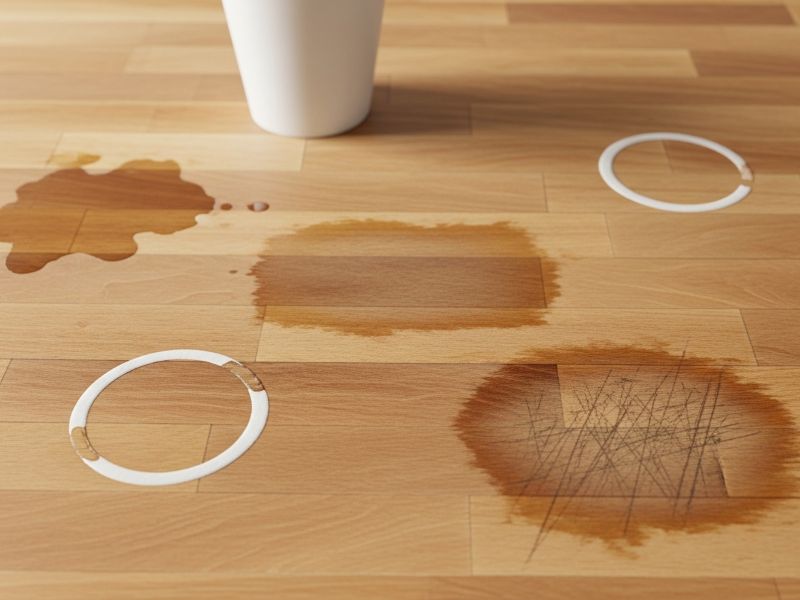
Watch for Warning Signs
- Water absorption, dullness, white rings, or rough texture signal maintenance is needed.
- Sticky surfaces may indicate finish failure – strip and refinish if necessary.
Full Refinishing
- Expect full refinishing every 3-7 years depending on finish type and usage.
- Strip old finish, sand, and reapply following original instructions. Consider professionals for large or complex countertops.
Common Mistakes to Avoid When Finishing Butcher Block
Even a quality butcher block can fail if finishing steps are done incorrectly. Avoid these common mistakes to ensure a durable, food-safe surface and reduce the need for early refinishing.
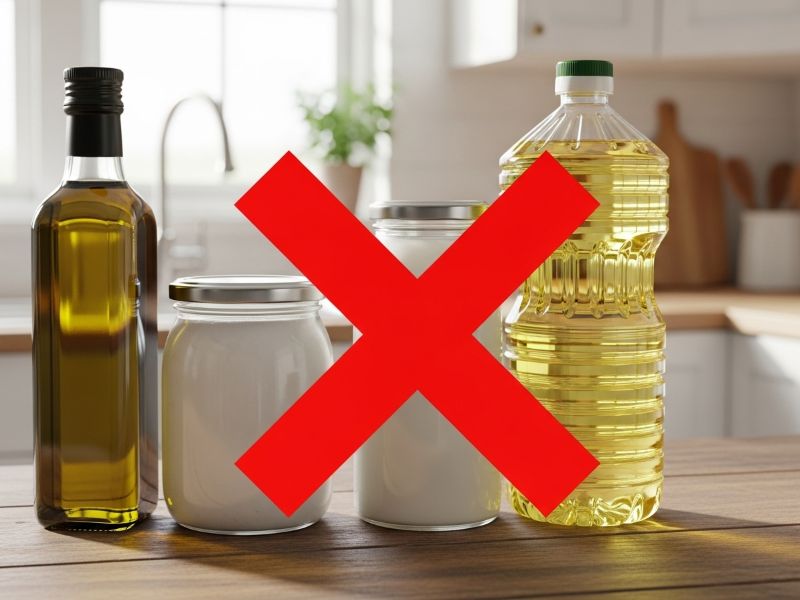
Using cooking oils
Finishing with olive, coconut, or vegetable oil is a common error. These oils don’t cure properly, stay sticky, and eventually turn rancid, leading to bad odors and bacterial growth. Warm kitchens accelerate this process, making the surface unsafe. Always choose food-grade mineral oil or a dedicated butcher block conditioner – they resist rancidity and provide stable, long-term protection.
Poor surface preparation
Rushing, sanding, or skipping grits can cause adhesion problems, uneven absorption, or visible mill marks. Dust left on the surface prevents finishes from bonding correctly. Proper preparation – progressive sanding and thorough cleaning – takes time but ensures a smooth, durable finish that lasts years longer.
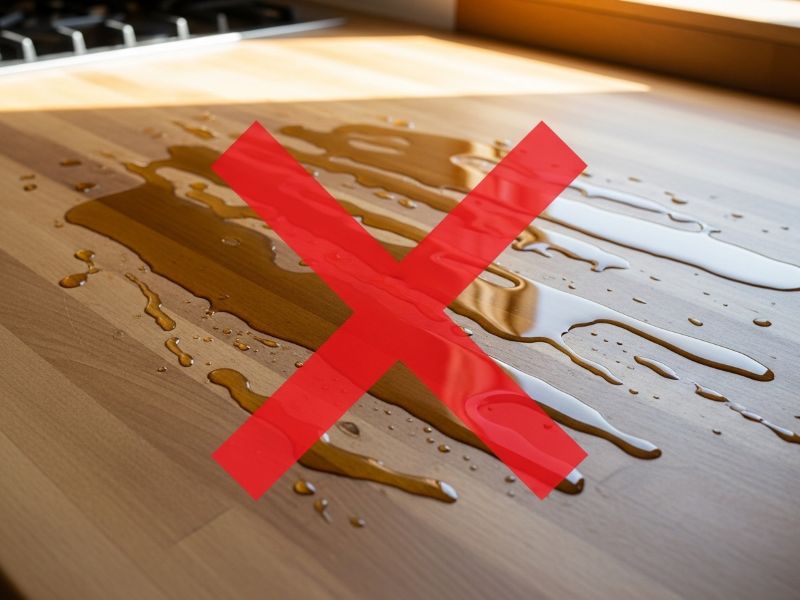
Applying too much finish
Thicker coats don’t equal better protection. Excess oil or finish sits on the surface, creating sticky spots that attract dirt. Most finishes are designed to penetrate the wood fibers, so thin, even coats applied in layers work best. Always follow the manufacturer’s instructions for application and removal.
Not allowing enough curing time
Using the countertop before the finish has fully cured can leave permanent impressions or damage the protective layer. Different finishes require anywhere from several hours to several weeks to cure properly. Plan ahead so your countertop can rest undisturbed for the full recommended time.
Overlooking food safety
Some finishes are not safe for direct food contact or only become food-safe after curing. Always read labels and confirm certifications before use. If unsure, contact the manufacturer rather than relying on online opinions or retail advice.
Ignoring temperature and humidity
Finishing in a cold, humid, or poorly ventilated environment can cause cloudiness, slow curing, or weak adhesion. Aim for stable indoor conditions – around 65–75°F with moderate humidity – and ensure good air circulation.
Using contaminated tools
Dirty brushes, rags, or sponges can introduce dust or debris that mars the surface. Use clean, appropriate applicators for oil-based or water-based finishes, and clean or replace tools between coats. Store materials properly to keep them free of dust and moisture.
Final Thoughts: The Best Way to Finish Butcher Block
Finishing butcher block successfully means balancing food safety, durability, appearance, and the level of maintenance you’re willing to handle. No single product works for every kitchen, so choosing the right finish for your needs is key.
Finish Selection Summary
| Finish Type | Best Use Case | Key Advantage | Primary Limitation |
|---|---|---|---|
| Mineral Oil | Light-use cutting surfaces | Maximum food safety | High maintenance frequency |
| Beeswax Blend | Moderate-use prep areas | Balance of protection and safety | Regular reapplication needed |
| Tung Oil | Heavy-use food prep | Excellent penetration and durability | Long initial curing period |
| Hardwax Oil | Premium installations | Professional durability | Higher initial cost |
| Oil-Resin | Non-food prep surfaces | Maximum durability | Not food-safe |
| Polyurethane | Decorative applications | Lowest maintenance | Artificial surface feel |
Scenario-Based Recommendations
- Active cooking families: Tung oil or food-safe hardwax oils offer excellent protection with reasonable upkeep.
- Weekend cooks: Beeswax blends give good looks and protection without excessive maintenance.
- Rental properties: Mineral oil is affordable and safe, leaving tenants with flexibility.
- Eco-conscious homes: Pure tung oil (plant-based) provides great durability while avoiding petroleum products.
- Professional kitchens: Hardwax oils meet strict durability and food-safety demands for high-volume use.
Keys to Long-Term Success
Finishing isn’t a one-time job. Ongoing maintenance and observation keep the butcher block looking beautiful and safe. Reapply finishes based on how your countertop performs – not just a calendar schedule. Areas with heavier use may need more frequent care.
Proper preparation, quality materials, and patience during curing are the foundations for years of reliable service. Small, consistent care efforts are far more effective than occasional major overhauls.
Butcher block develops character over time, becoming more attractive with proper care. By choosing the right finish for your lifestyle and applying it correctly, your countertop will serve your kitchen for decades.
Ultimately, the best way to finish butcher block is to match the finish to your cooking habits, maintenance routine, and design goals – then maintain it consistently for lasting beauty and performance.