Every kitchen has a favorite cutting board – worn, scratched, and dry from years of use. Left untreated, those grooves trap bacteria and weaken the wood. Learning how to restore a cutting board not only revives its look but also keeps your kitchen safe. This guide walks you through inspection, cleaning, sanding, oiling, and long-term maintenance to bring your board back to life.

When to Restore a Cutting Board
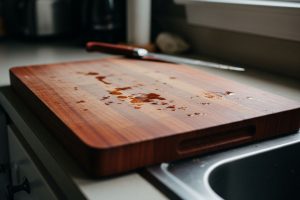
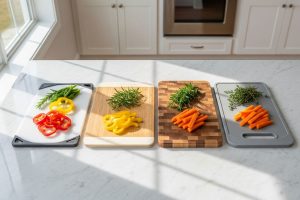
Wood cutting boards signal their need for attention through visible and tactile cues. Recognizing these signs early prevents irreversible damage and maintains food safety standards.
Signs Your Board Needs Restoration:
- Rough texture: Feels coarse or fuzzy – wood fibers are lifting from moisture and knife use.
- Dark stains: Food and bacteria have penetrated the surface.
- Water soaks in instantly: The protective oil layer is gone.
- Deep knife grooves: Cuts trap residue and weaken the surface.
Condition Assessment Table:
| Condition | Likely Cause | Recommended Action |
|---|---|---|
| Rough, fuzzy texture | Raised wood fibers from moisture | Sand with 180-220 grit, re-oil |
| Dark streaks or stains | Food particle penetration | Deep clean, sanitize, sand if needed |
| Water absorbs immediately | Depleted oil coating | Clean and apply 3-4 oil coats |
| Deep knife grooves (>1mm) | Extended use without maintenance | Sand smooth, then oil and wax |
Why timing matters:
- Deep grooves and open pores collect bacteria beyond reach of cleaning.
- Oiling seals the wood and blocks moisture.
- Restoring costs about $15–25, compared to $75–150 for a new quality board.
- Restoring instead of replacing can also save up to 15 lb of hardwood waste.
Once you’ve confirmed your board needs attention, the restoration process follows a systematic sequence that rebuilds the surface layer by layer.

Read more: Wood Cutting Board Splitting: Causes, Step-by-Step Fixes
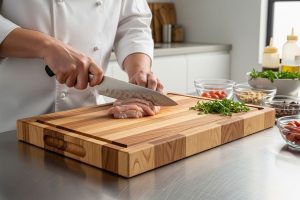
Step by Step to Restore a Cutting Board
Restoring a cutting board takes four steps: clean, sand, oil, and wax. Each layer rebuilds the surface, making it look and perform like new in about two days.
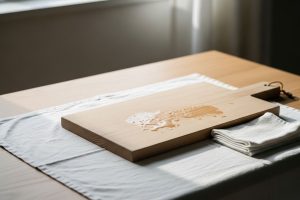
Cleaning the Cutting Board
Proper cleaning removes residue and odors before sanding reveals new wood. Skipping this step can grind contaminants deeper into the grain.
Use warm (not hot) water and a few drops of dish soap. Scrub both sides with a stiff brush, working across the grain to lift debris. Rinse until water runs clear, then air-dry upright for 2–4 hours.
For odor removal, sprinkle coarse salt and scrub with half a lemon, or spread a baking-soda paste (3 parts baking soda : 1 part water), rest 15 minutes, then rinse.
For extra sanitizing, mist the board with 3% hydrogen peroxide, let it fizz 10 minutes, then rinse. (Never mix peroxide with vinegar.)
When the surface feels clean and dry, test it by touch – any roughness means it’s ready for sanding.

Read more: How to Clean A Wooden Cutting Board: A Practical Guide (2025)
Sanding the Surface
Sanding removes knife scars, stains, and lifted grain, exposing smooth, fresh wood ready to absorb oil.
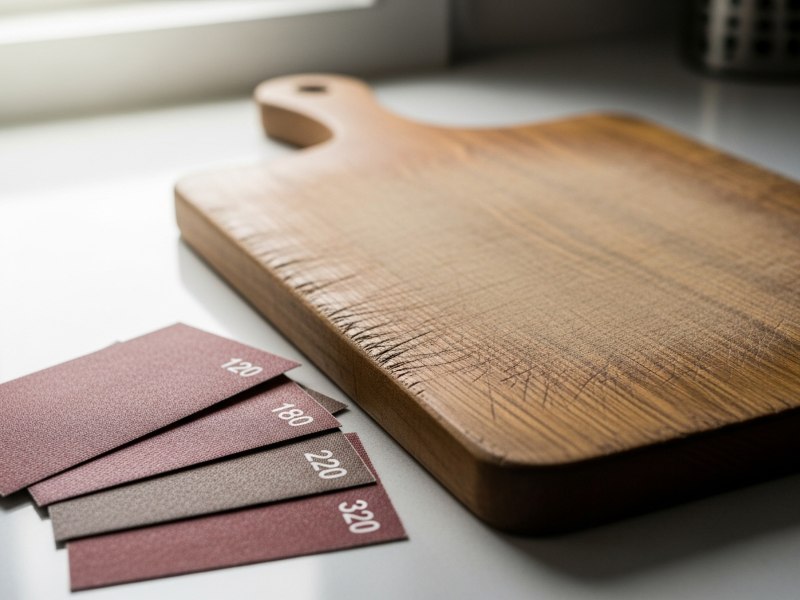
Grit progression guide:
- 80-grit: Removes deep scratches and significant material (use only for severe damage)
- 120-grit: Standard starting point for most restoration work
- 180-grit: Smooths out scratches from coarser grits
- 220-grit: Final pass creating a refined surface ready for oil
Always sand with the grain, using even pressure and overlapping passes. Work systematically over the entire surface. After each grit, vacuum or brush away dust before moving finer.
To ensure a truly smooth finish, use the grain-raising method: after sanding with 220-grit, wipe the surface lightly with a damp cloth and let dry 30 minutes. This lifts any loose fibers. Finish with one final 220-grit pass to remove them.
Avoid these mistakes:
- Uneven pressure (creates dips and waves).
- Skipping grit levels (leaves visible scratches).
- Sanding across grain (permanent marks).
- Forgetting to remove dust (causes gritty texture under oil).
When the surface feels consistently smooth, the board is ready for oiling.
Read more: How to Fix a Warped Wooden Cutting Board: Causes, Solutions, and Prevention Guide
Oiling the Cutting Board
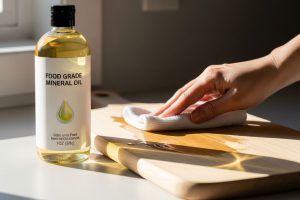
Oiling replenishes the wood’s natural barrier, restoring moisture balance and protection against bacteria and stains.
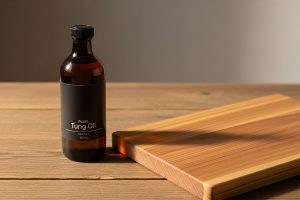
Use only food-safe oils:
- Mineral oil (USP grade): the classic, odor-free choice that never turns rancid.
- Walnut oil: gives a warm finish but can trigger nut allergies.
- Fractionated coconut oil: a plant-based option that stays liquid and resists spoilage.
Avoid olive, canola, or vegetable oils – they oxidize, smell bad, and leave sticky residue.
How it works: wood fibers are like hollow tubes; oil fills these cells through capillary action, creating a hydrophobic layer. Proper saturation protects from within.
Application steps:
- Pour a generous amount of oil to form a light sheen.
- Spread evenly with a lint-free cloth, working along the grain.
- Let soak for 20–30 minutes, then wipe off excess.
- Repeat 3–4 times over 24 hours for deep conditioning.
Tip: warm the oil by placing the bottle in hot water for 5 minutes before use – thinner oil penetrates faster.
Signs of success: the board looks darker and richer, feels supple rather than dry, and water beads on the surface instead of soaking in.
Once fully oiled, move on to waxing, which locks the moisture inside.

Read more: How to Oil a Cutting Board: Step-by-Step Guide for Long-Lasting Results
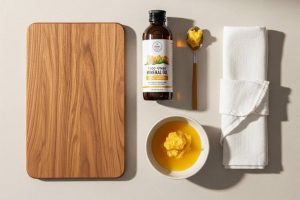
Waxing for Extra Protection
Wax adds the final protective seal that oil alone can’t provide. It blocks moisture, enhances shine, and makes the board easier to clean.
DIY board balm recipe:
- Melt 1 part beeswax with 4 parts mineral oil in a double boiler.
- Stir until smooth, pour into a clean jar, and let cool for 2–3 hours.
- The result is a soft, spreadable paste.
To apply: scoop a small amount and rub it in circular motions across the board. Let it sit 15–20 minutes so the wax bonds to the surface, then buff with a clean cloth until the finish feels smooth and satin-like.
Allow the board to cure 24 hours before use. During this time, wax molecules interlock with the wood fibers, forming a durable shield.
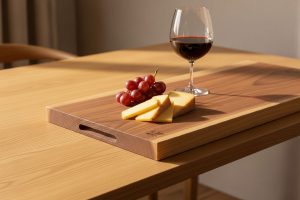
When properly waxed, your cutting board should feel silky to the touch and repel water instantly – proof that you’ve fully restored your cutting board for long-term use.

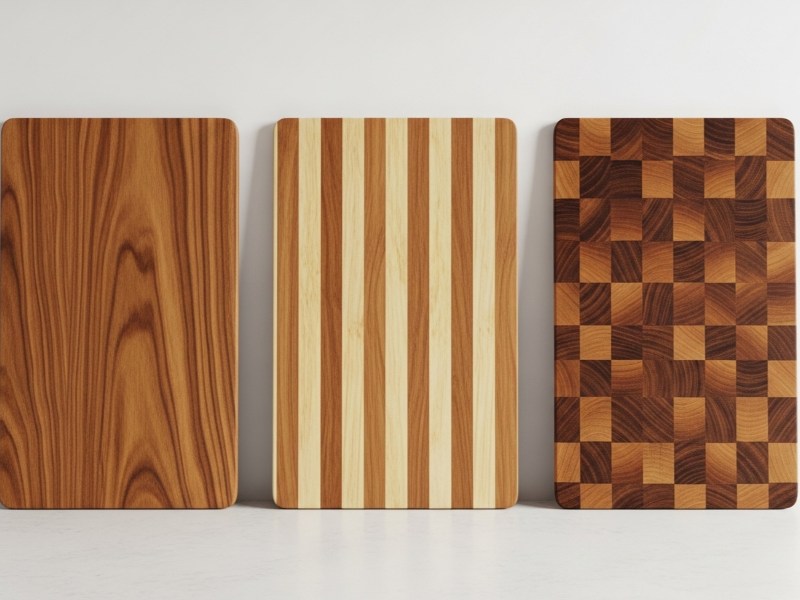
Special Care for End Grain vs Edge Grain Boards
End-grain and edge-grain cutting boards differ in wood fiber direction, affecting how they absorb oil, handle moisture, and react to knife cuts. Understanding this helps you restore and maintain your cutting board the right way.
End-grain cutting boards have upright wood fibers that absorb oil quickly and protect knife edges. Because they dry out faster, oil them every 2–3 weeks, applying 2–3 coats each time. Signs they need care include lighter color, dryness to the touch, or water soaking in instead of beading.
Edge-grain boards are denser, absorbing oil more slowly but holding it longer. Oil them every 4–6 weeks, using two coats per session. Watch for fading color or slight roughness. Always treat the edges well – these exposed areas dry fastest and can warp if neglected.
Read more: End Grain vs Edge Grain vs Face Grain Cutting Boards: Which One Should You Choose?
Construction-specific considerations:
Edge-grain boards benefit from sealing the edges thoroughly – these end-grain areas on the board’s perimeter absorb moisture quickly and can cause warping if neglected. When oiling, spend extra time on edges, applying oil until no more absorbs.
Comparative care overview:
| Feature | End Grain | Edge Grain |
|---|---|---|
| Fiber orientation | Vertical (exposed ends) | Horizontal (long edge) |
| Oil absorption rate | High (absorbs quickly) | Moderate (absorbs slowly) |
| Oiling frequency | Every 2-3 weeks | Every 4-6 weeks |
| Coats per session | 3-4 coats | 2-3 coats |
| Primary benefit | Knife-friendly, self-healing | Dense surface, longer conditioning |
| Watch for | Rapid drying, fine cracks | Gradual fading, edge wear |
Regardless of construction type, consistent maintenance after restoration determines how long your board remains in prime condition.
Regular Maintenance After Restoration
Restoration gives your cutting board new life, but proper care keeps it that way. Routine cleaning, oiling, and waxing prevent dryness, stains, and warping.
Care schedule:
| Timeframe | Action | Why It Matters |
|---|---|---|
| After each use | Wash with soap and water, dry upright | Prevents bacterial growth and moisture damage |
| Weekly | Deep clean with salt/lemon if needed | Removes stubborn odors and staining |
| Monthly | Apply 2 oil coats | Maintains cellular saturation and water resistance |
| Quarterly | Wax coating | Reinforces surface seal and extends oil effectiveness |
| Annually | Light sanding (220-grit) if needed | Removes accumulated knife marks before they deepen |
Cleaning tips:
- Never use a dishwasher – heat and water ruin wood fibers.
- Don’t soak boards; even brief submersion causes warping.
- Avoid bleach or harsh detergents – they strip oils and leave residue.
Storage & longevity: Store boards upright in a dry, shaded area. Avoid moisture, sunlight, and heat sources that cause cracking or mold.
Avoid common mistakes: using before oil cures, applying oil to dirty surfaces, leaving the board wet, or ignoring small cracks. Proper maintenance keeps your restored board safe, smooth, and beautiful for years.
When a Cutting Board Cannot Be Restored
Not every cutting board can be saved. Some damage weakens the wood or traps bacteria deep inside, making replacement the safer choice.
Signs your board can’t be restored:
- Deep cracks (over 2–3 mm): Harbor bacteria and moisture that cleaning or sanding can’t remove.
- Severe warping: A board that rocks or won’t sit flat has internal stress that will re-warp after sanding.
- Mold growth: Black or persistent dark spots show fungal penetration below the surface.
- Glue seam failure: Gaps between pieces trap debris and signal structural breakdown.
When to replace instead of restore:
- Knife grooves deeper than 2 mm over large areas.
- Musty odors that remain after cleaning.
- Dark stains that don’t fade with hydrogen peroxide.
If your board meets these conditions, replacing it is best for food safety. Still, consider eco-friendly reuse: cut undamaged areas into small prep boards, trivets, or serving pieces, or recycle as scrap wood.
Knowing when to retire a board protects your health and ensures the rest of your kitchen tools remain safe and hygienic.

From Restoration to Preservation – Final Takeaway
A cutting board’s life moves through clear stages: use, wear, restoration, and preservation. The goal isn’t perfection – it’s learning when to act before damage takes hold. With regular cleaning, oiling, and waxing, a quality wood board can last 10–15 years, compared to only a few when neglected.
Beyond durability, maintenance also protects your kitchen’s hygiene. Oiled wood seals pores that trap bacteria, while proper drying prevents mold and warping. Each restored board saves hardwood and reduces waste, making this small act of care part of a sustainable kitchen routine.
Over time, you’ll recognize your board’s needs by feel – the dryness of its surface, the dullness of its sheen. That awareness marks the shift from fixing damage to preserving craftsmanship. A board restored today can serve beautifully for generations to come.