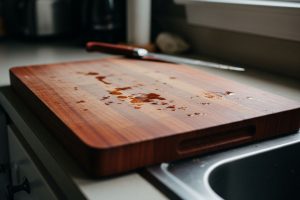
You spot a crack in your favorite cutting board – a classic case of wood cutting board splitting. It’s not a failure, just wood reacting to moisture, heat, and time. This guide explains why splits happen, how to repair them effectively, prevent future damage, and know when it’s smarter to replace your board altogether.

Why Is My Wood Cutting Board Splitting?
Wood cutting board splitting happens when the wood’s internal stress exceeds its strength – usually due to uneven moisture changes. Because wood absorbs and releases water from the air, one side may expand or contract faster than the other, pulling fibers apart and forming cracks.
Several conditions accelerate this process:
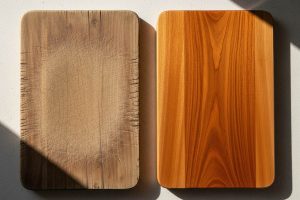
- Lack of conditioning: Untreated wood loses its natural oils through repeated washing. Without a protective barrier, moisture penetrates deeply during use and evaporates rapidly afterward. This cycle creates continuous expansion and contraction that weakens fiber bonds.
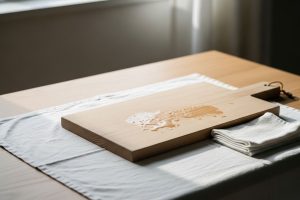
- Water exposure: Submerging a board in dishwater or leaving it soaking saturates the fibers. When the board air-dries, the outer layers contract faster than the interior, generating surface tension that manifests as cracks.
- Heat and dry air stress: Placing a board near stoves, dishwashers, or heating vents creates localized drying. One section shrinks while the rest maintains its dimensions, forcing a split along the path of least resistance.
- Uneven use patterns: Concentrating cutting activity in one area wears down the surface unevenly. Combined with inconsistent oiling, these worn sections become stress points where cracks initiate.
Identifying Split Causes and Solutions
| Cause | Visual Sign | Severity | Prevention Tip |
|---|---|---|---|
| Insufficient oiling | Fine surface cracks, rough texture | Low | Oil monthly in dry climates, quarterly in humid |
| Dishwasher exposure | Deep longitudinal splits, warping | High | Hand wash only, dry immediately |
| Heat proximity | Cracks near edges, cupping | Medium-High | Store away from appliances, maintain room temp |
| One-sided drying | Splits on single surface, uneven color | Medium | Dry both sides equally, stand upright |
| Poor grain orientation | Splits perpendicular to length | Medium | Choose end-grain construction when replacing |
Splitting isn’t random – it’s wood reacting naturally. Once you identify the cause, you can repair and prevent it from happening again.

How to Fix a Split Cutting Board (Step by Step)
Repairing a split cutting board requires patience and attention to the wood’s condition. The goal is to reestablish fiber contact, create a lasting bond, and restore the surface to a food-safe state. Each step builds on the previous one—skip ahead, and the repair fails.
Step 1: Clean and Dry the Board
A successful repair begins with a completely dry cutting board. Moisture is the biggest enemy of a strong bond – glue won’t adhere to damp fibers.
Wash the board gently with warm water and mild soap to remove food residue. Wipe it with a clean towel, then stand it upright on its edge in a room with 40–60% humidity for at least 24–48 hours. In very humid environments, allow up to 72 hours.
Avoid direct sunlight or heaters – forced drying can warp the board further. Instead, let air circulate naturally. Check dryness by touching the crack: it should feel dry and the same temperature as the room. If it’s cool or smells musty, keep drying.
Tip: Never rush this step. Applying glue to damp wood leads to weak joints and future splitting.

Step 2: Apply Wood Glue to the Split
Once dry, you’re ready to bond the fibers. Choose a food-safe, waterproof wood glue such as Titebond III Ultimate Wood Glue, which meets FDA standards for indirect food contact.
For narrow cracks (under 1/8 inch), use a small brush to work glue deep into the split. For wider ones, use a syringe for more control. Make sure both sides of the crack are coated.
If your wood cutting board splitting has created a visible gap, mix some fine sawdust from the same wood species with glue (roughly 1 part sawdust to 3 parts glue) to create a color-matched filler.
Once filled, align the edges carefully. Use bar clamps spaced about every six inches to close the gap. Tighten gradually and evenly until a small line of glue squeezes out. That means good contact. Avoid over-tightening – it can starve the joint of adhesive or cause bowing.

Step 3: Let It Cure
Curing is where patience pays off. Keep the board clamped for at least 24 hours in a consistent environment (around 65–75°F / 18–24°C). Resist the urge to check it early – disturbing the joint before full cure can ruin the repair.
You’ll know the glue has cured when the squeeze-out turns from milky white to amber and feels hard to the touch. Once set, remove the clamps carefully and flex the board gently. A solid feel means a successful bond; any movement or cracking noise means the joint didn’t hold and needs redoing.

Step 4: Sand the Surface
Now that the structure is restored, it’s time to smooth and level the surface. Start with 120-grit sandpaper to remove excess glue and level out the repair. Use a sanding block or pad to maintain even pressure and avoid dips.
Always sand along the grain, not across it. Move gradually to 180-grit, then finish with 320-grit for a smooth, silky feel. This step not only blends the repair but also opens the wood pores to accept conditioning oil later.
Wipe off all sanding dust with a tack cloth or slightly damp towel. Even small dust particles can mix with oil and dull the finish.

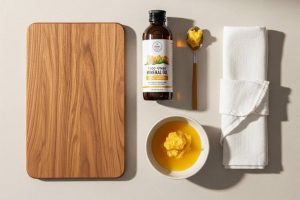
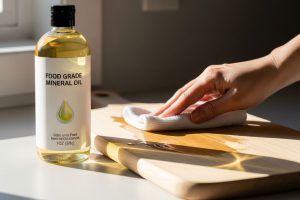
Step 5: Re-Oil and Condition
Sanding leaves the wood thirsty for moisture – and unprotected wood absorbs water unevenly, which can cause another split. Re-oiling is crucial.
Use food-grade mineral oil, which penetrates deeply and won’t go rancid. Pour a generous amount on the board and rub it in using a clean, lint-free cloth in circular motions. The repaired area may soak up more oil – that’s normal.
Let the oil sit for 20–30 minutes, then wipe off the excess. Flip the board and repeat on the other side and edges to ensure balanced moisture absorption.
For extra durability, apply a beeswax and mineral oil blend after the first coat. Warm the mixture slightly, apply a thin layer, and buff it to a soft sheen. This adds a protective barrier against water and helps maintain the repair.
Post-Repair Assessment: Inspect under good light. The repaired seam should look tight and smooth. Tap near the fix – solid sound means success, a dull thud means the bond is weak. Finally, flex the board gently; if it moves as one, your repair is complete and ready for use.

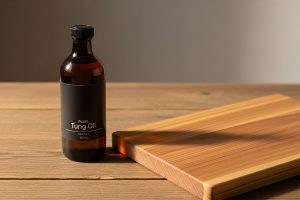
Read more: 7 Best Oils for Cutting Boards: Complete Food-Safe Guide (2025 Update)
How to Keep a Wood Cutting Board from Splitting
Prevention addresses the conditions that cause splitting before damage occurs. Consistent care routines maintain the wood’s moisture balance and structural integrity.
Establish a Conditioning Schedule
Conditioning keeps your cutting board hydrated and stable. Without oil, wood fibers dry out, shrink, and eventually split. How often you should oil your board depends on your climate and usage:
- Arid or dry climates (below 40% humidity): oil every 3–4 weeks. The air pulls moisture from the wood quickly.
- Moderate climates (40–60% humidity): oil every 2–3 months. Natural air moisture helps balance the wood.
- Humid climates (above 60% humidity): oil every 3–4 months. Even though the air is damp, oil still protects the board from uneven absorption.
If you notice your board looking dull, rough, or lighter in color, it’s time to oil – regardless of the schedule. Seasonal transitions, like the shift from dry winter air to humid spring, can also stress the wood. Add an extra oiling session during these times to keep it stable.
Oiling Schedule by Climate Zone
| Climate Zone | Humidity Range | Oiling Frequency | Additional Notes |
|---|---|---|---|
| Arid/Desert | Below 30% | Every 3-4 weeks | Monitor for surface roughness between treatments |
| Dry Continental | 30-40% | Monthly | Focus on edges and end-grain sections |
| Moderate Coastal | 40-60% | Every 2-3 months | Standard maintenance sufficient |
| Humid Subtropical | 60-75% | Quarterly | Watch for mold in storage; ensure complete drying |
| Tropical | Above 75% | Every 3-4 months | Air circulation during storage critical |
Follow Proper Cleaning Methods
Improper cleaning is one of the main reasons for wood cutting board splitting. The board absorbs water easily, so long soaking or dishwasher cleaning forces water deep into the fibers. As it dries, one side shrinks faster than the other – and cracks appear.
To clean safely:
- Use warm water and a small amount of mild dish soap.
- Scrub gently with a soft brush or sponge – don’t let water sit on the surface.
- Rinse quickly, keeping the board tilted so water runs off.
- Dry immediately with a clean towel on both sides.
- Stand the board upright on its edge for 30–60 minutes so air reaches all surfaces evenly.
For tough stains or lingering odors, try natural solutions:
- Baking soda paste (baking soda + water): scrub and rinse after 5 minutes.
- Lemon juice + coarse salt: removes odors and disinfects. Rinse thoroughly afterward, as acid can dry the fibers if left on too long.
Pro Tip: Never put a wooden cutting board in a dishwasher or leave it soaking in the sink – even a short time can cause irreversible warping or splitting.

Read more: How to Clean A Wooden Cutting Board: A Practical Guide (2025)
Control the Storage Environment
Where you keep your board matters as much as how you clean it. Heat, humidity, and airflow all influence whether your board stays flat or develops splits.
- Avoid heat sources: Don’t store cutting boards near stoves, dishwashers, ovens, or sunny windows. Localized heat dries one side faster and causes tension inside the wood.
- Keep humidity balanced: Aim for indoor humidity between 40% and 60%. A small hygrometer can help monitor levels. Use a humidifier during dry winter months or a dehumidifier in humid summers.
- Store upright: Standing boards on their edge promotes even airflow. If you must store flat, place spacers underneath so moisture doesn’t get trapped.
- Rotate your boards: If you have several, alternate use. Giving each board time to “rest” helps it equalize moisture naturally and prolongs lifespan.
By keeping storage conditions consistent, you reduce stress cycles that cause wood cutting board splitting over time.

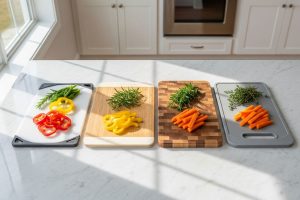
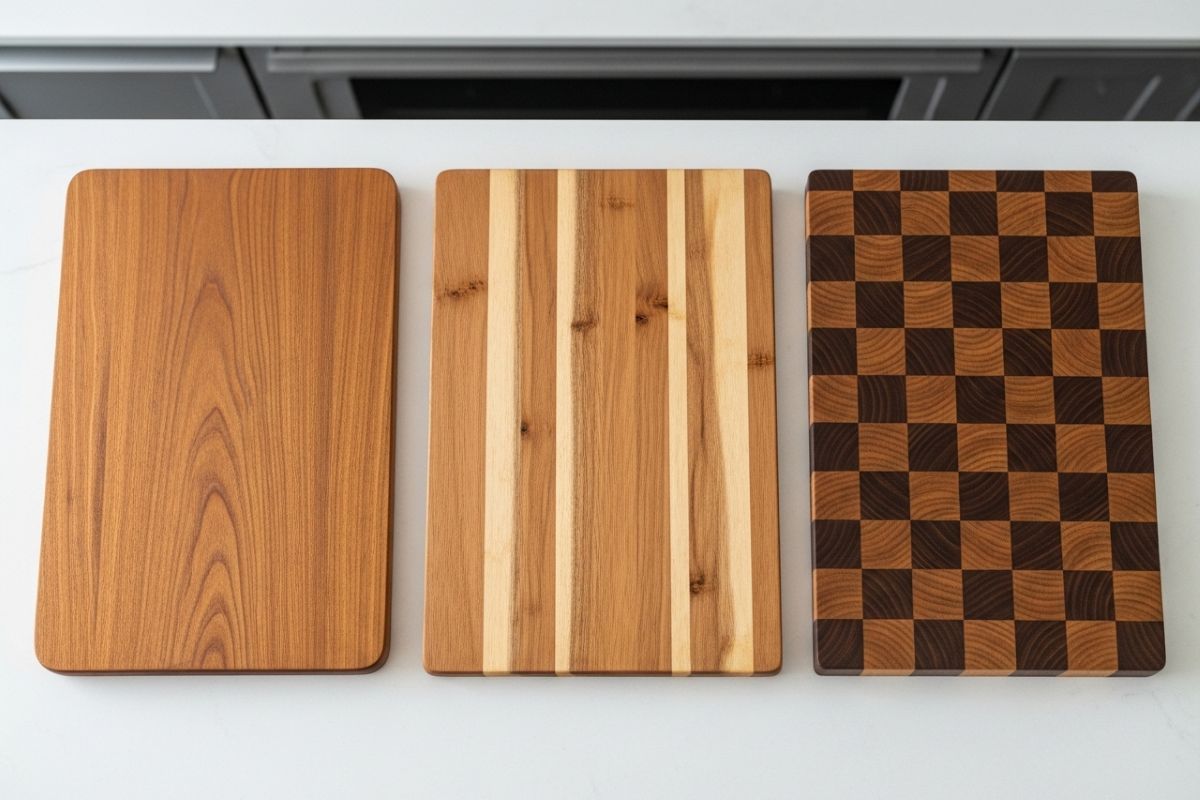
Choose Construction Wisely
Not all boards resist splitting equally. The construction style – end-grain vs. edge-grain – determines how the wood reacts to moisture and knife pressure.
Construction Comparison
| Feature | End-Grain | Edge-Grain |
|---|---|---|
| Fiber orientation | Vertical (ends visible) | Horizontal (side visible) |
| Knife wear | Self-healing, minimal scarring | Shows cut marks over time |
| Dimensional stability | Movement in multiple directions equalizes stress | Primary movement across width |
| Split resistance | High, no continuous grain lines | Moderate, splits follow grain |
| Maintenance needs | Moderate oiling | Frequent oiling |
| Cost | Higher due to labor-intensive construction | More economical |
| Weight | Heavier, denser | Lighter, easier to handle |
The connection between construction and splitting returns to the wood science discussed earlier. End-grain boards present no continuous grain path for cracks to follow. Edge-grain boards have grain running the full length, creating a natural fault line. Understanding this relationship helps you select boards that match your maintenance commitment.
Read more: End Grain vs Edge Grain vs Face Grain Cutting Boards: Which One Should You Choose?
When to Replace a Split Cutting Board
Even the best care can’t save every split cutting board. Some damage goes beyond repair – and knowing when to replace a cutting board keeps your kitchen safe and sanitary.
- Deep or wide cracks: If a split runs deeper than halfway through the board or traps food particles, bacteria can thrive inside. Once moisture and debris enter, cleaning can’t reach these hidden areas. Deep fissures often harbor Salmonella or E. coli, turning your board into a contamination risk.
- Structural instability: A board that rocks, twists, or feels loose when pressed has lost its internal strength. Multiple repair attempts may also weaken the surrounding fibers, causing new splits to appear. After two or three failed repairs, replacement is the safer, more practical choice.
- Failed glue joints or delamination: Boards made from several wood strips rely on glue to stay intact. When these joints start to separate, moisture has broken the bond – and no amount of oiling will stop further splitting.
- Visible mold or black stains: Dark discoloration that penetrates deeply into the wood signals bacterial or mold growth. Surface sanding can’t remove it completely, and continued use risks contamination.
| Damage Type | Depth/Severity | Can Repair? | Action |
|---|---|---|---|
| Surface cracks | Less than 1/8″ deep, isolated | Yes | Sand, glue, condition |
| Single split | Full thickness but narrow | Yes | Full repair protocol |
| Multiple splits | 2-3 separate cracks | Possibly | Assess structural integrity first |
| Deep fissure | Over 1/4″ wide, food trapping | No | Replace immediately |
| Warping | Board rocks on countertop | No | Replace |
| Failed repair | Re-opened after gluing | No | Replace |
| Black staining | Penetrating into wood | No | Replace |
Safety takes precedence over sentiment. A board that’s served years of meals deserves retirement when it can no longer perform its function safely. The cost of foodborne illness outweighs the expense of a new board.

Final Thoughts: From Splitting to Sustaining
Wood cutting boards split when the natural moisture cycle becomes imbalanced through exposure, heat, or insufficient conditioning. Understanding this fundamental cause allows you to prevent damage before it occurs. When splits do develop, proper repair restores both structure and function – but only if you address the underlying cause.
The path from problem to mastery follows a logical sequence: recognize why wood moves, repair damage correctly, establish maintenance habits, and know when replacement serves you better than continued repair. Each step builds on wood science principles that apply whether you’re fixing a board or selecting a new one.
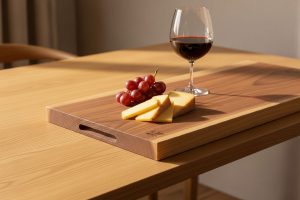
Consistency matters more than intensity. A board oiled regularly, cleaned gently, and stored properly will outlast one that receives sporadic intensive care. The small habit of conditioning monthly prevents the larger problem of replacing prematurely. Your attention to moisture balance determines whether a board serves two years or twenty.
A board that’s cared for properly won’t just last – it will tell the story of every meal.

Read more: How to Fix a Warped Wooden Cutting Board: Causes, Solutions, and Prevention Guide